
Summary
This is the final part of the three-part blog post.
Part1 and Part2 posts were focused on the basic settings for the Classic UI mode pipeline setup. In this post, I will explain more advanced, modular, and factory pattern ways of the CI/CD Azure DevOps pipelines.
My customer has Azure DevOps Server (ADOS) and pool agent as Windows OS for the default pool.
As defined in Part1, the prerequisite still applies to this approach. Additionally, you will need to have some basic familiarity with the YAML language. You will need the Git installed on your local machine. This approach uses the Microsoft Power Platform CLI. The Pac CLI performs better than Power Platform Build Tools defined in Part2.
Step by Step solution
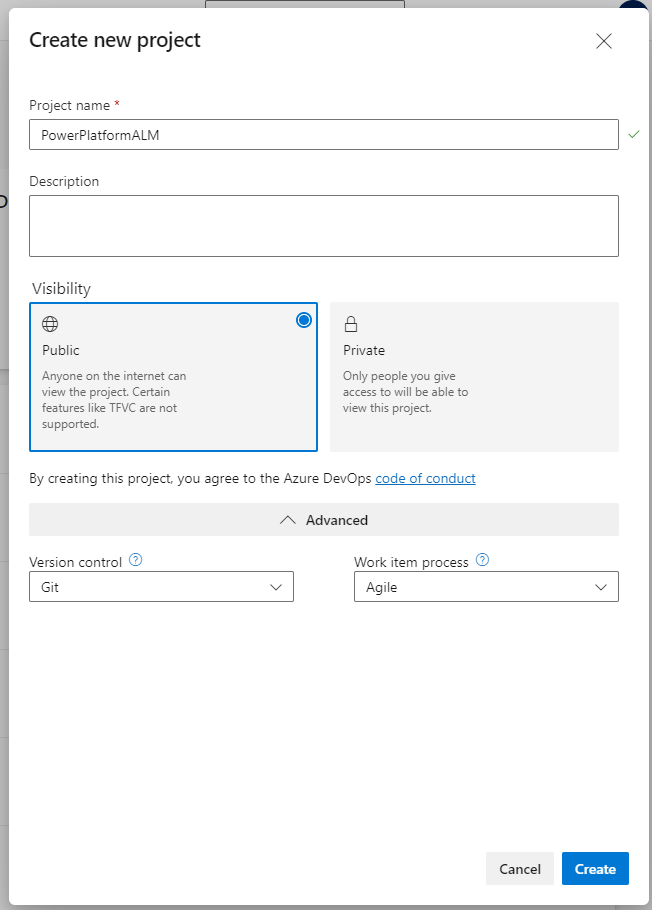
Step # 1 Create an organization and project in your Azure DevOps.
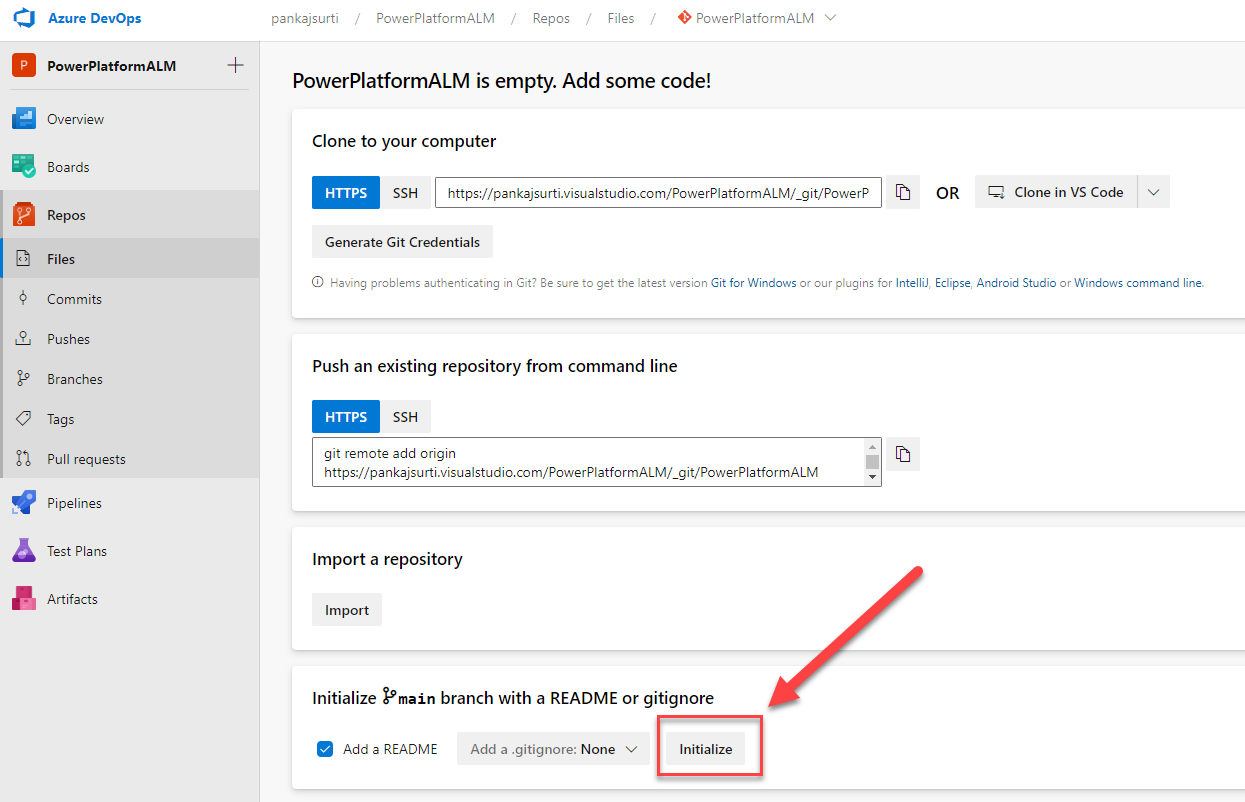
Step # 2 Initialize a blank Repository.
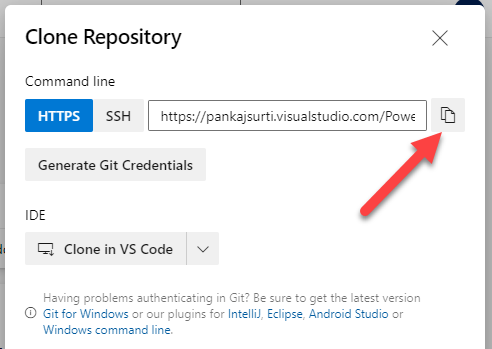
Step # 3 Clone the repository

### You will need Github installed on your local machine to run this command.
C:\SharePointDev\PowerPlatformALM>git clone {Your Clone repo URL}
Step # 4 Get the code from the GitHub repo. Copy files and folders to the root of the above local cloned repository.
The GitHub repo code is located here.

Step # 5 Using the following Git commands push the changed code to the Azure DevOps repo.
# this will check the status as untacked changes
git status
# this command will add the untracked changes to the local as tracked
git add .
# this command will commit to the local repository
git commit -m "Added .azdops and pwsh folders"
# this command will push the local commited changes to the remote repoository
git push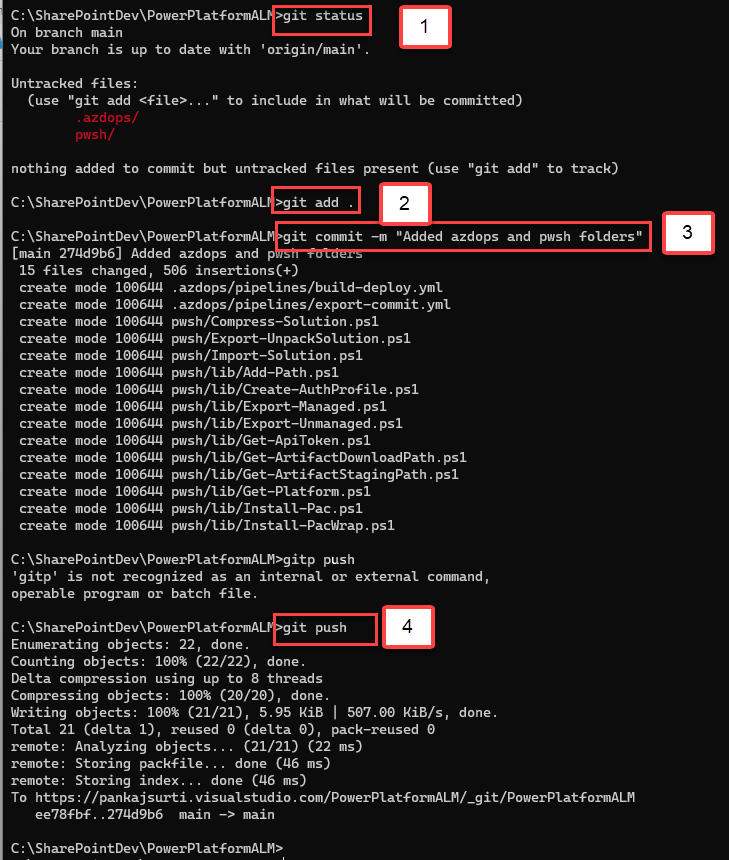
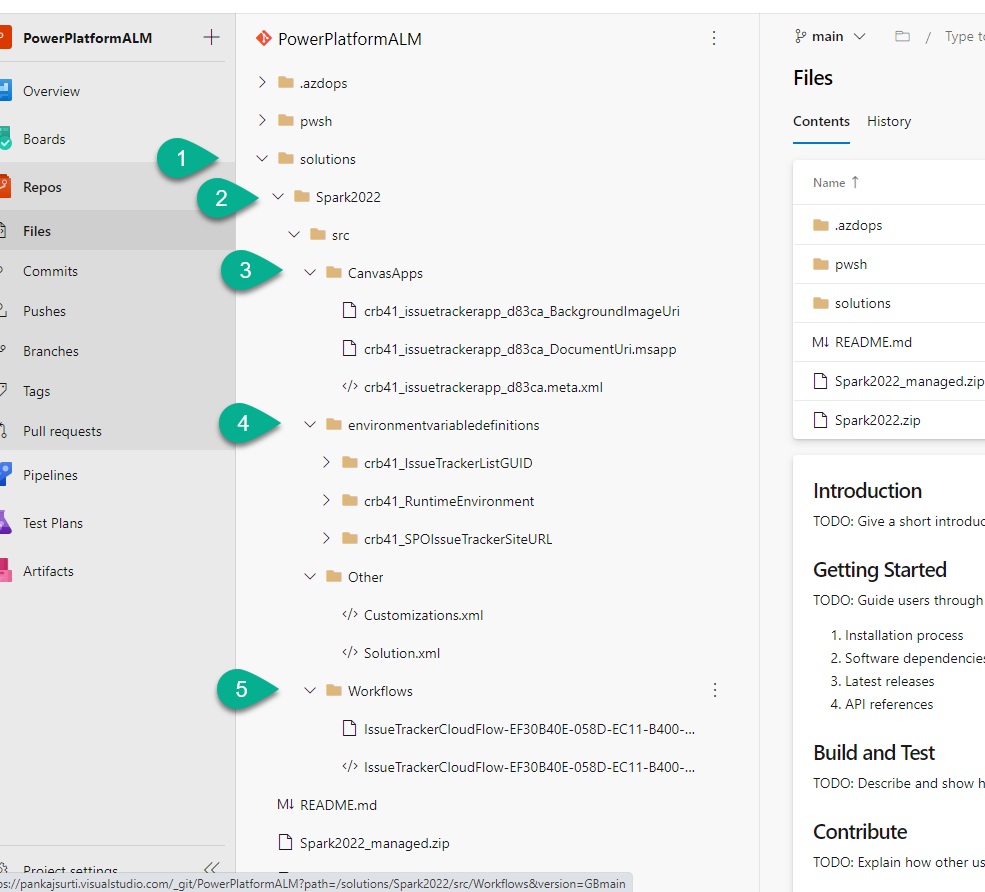
The final results to the Azure DevOps repository should look similar to the following. The .azdops and pwsh folders should be the top folder in your repository.

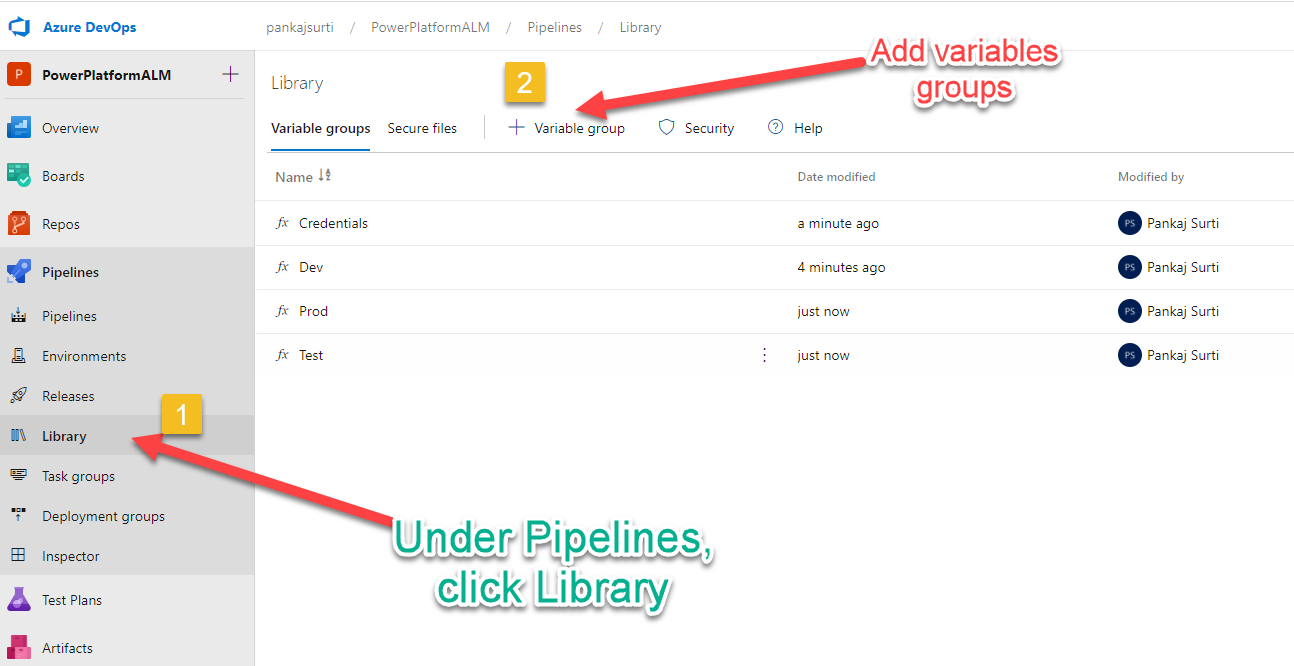
Step # 6 Create Azure Pipelines variable groups ‘Credentials’, ‘Dev’, ‘Test’, and ‘Prod’.
In the ADO project, click on the Library and Add the four variable groups. Now create variables in these variable groups. These variable groups are used in the YAML code. Please keep the name as defined below for variable groups and variables.
#
# Variable Group Crendential will have the following three variables.
#
ClientId = {Get the value from the Part1 blog post Step # 3 }
ClientSecret = {Get the value from the Part1 blog post Step # 3 }
TenantId = {Get the value from the Part1 blog post Step # 3 }
#
# Variable Group 'Dev', 'Test', 'Prod' will have the following variable.
# The Url value will be different for all three.
#
Url = {Get the value from the Part1 blog post Step # 2 }
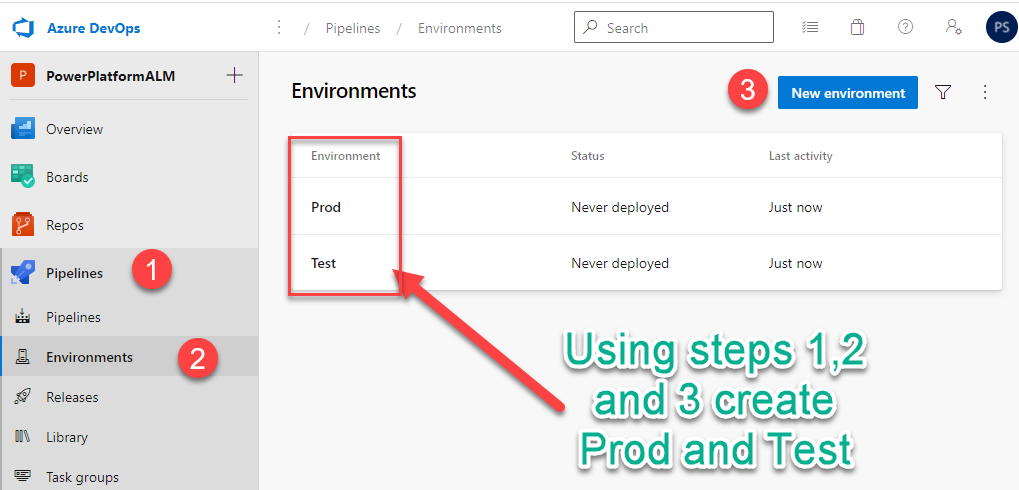
Note: The above values will be used in the pipeline.Step # 7 Define Test and Prod Azure DevOps Environments
Under pipelines -> environments, define test and prod environments. The environments can be used for adding any approval requirements.
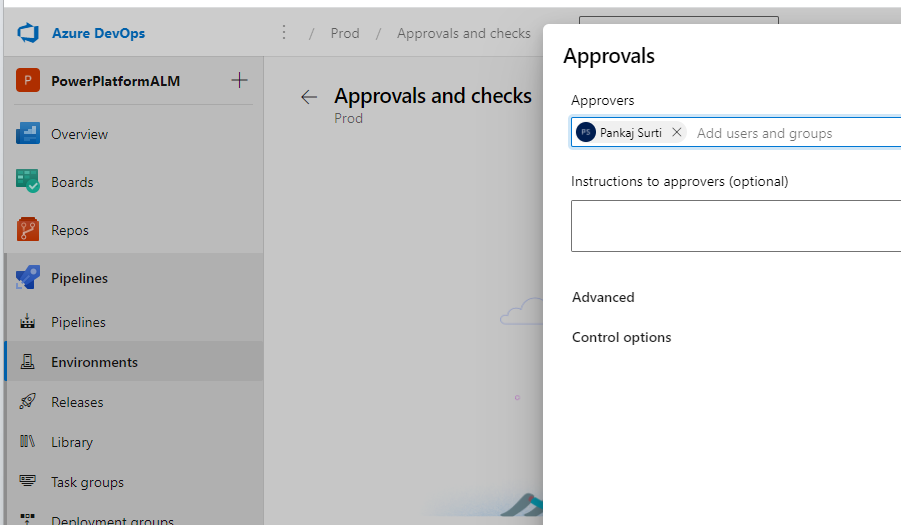
For the prod environment, (optional) add the approval settings. Assign one or more approvers.
Step # 9 Create a Pipeline using the existing file .azdops\pipelines\export-commit.yml
(Note: a longer step)

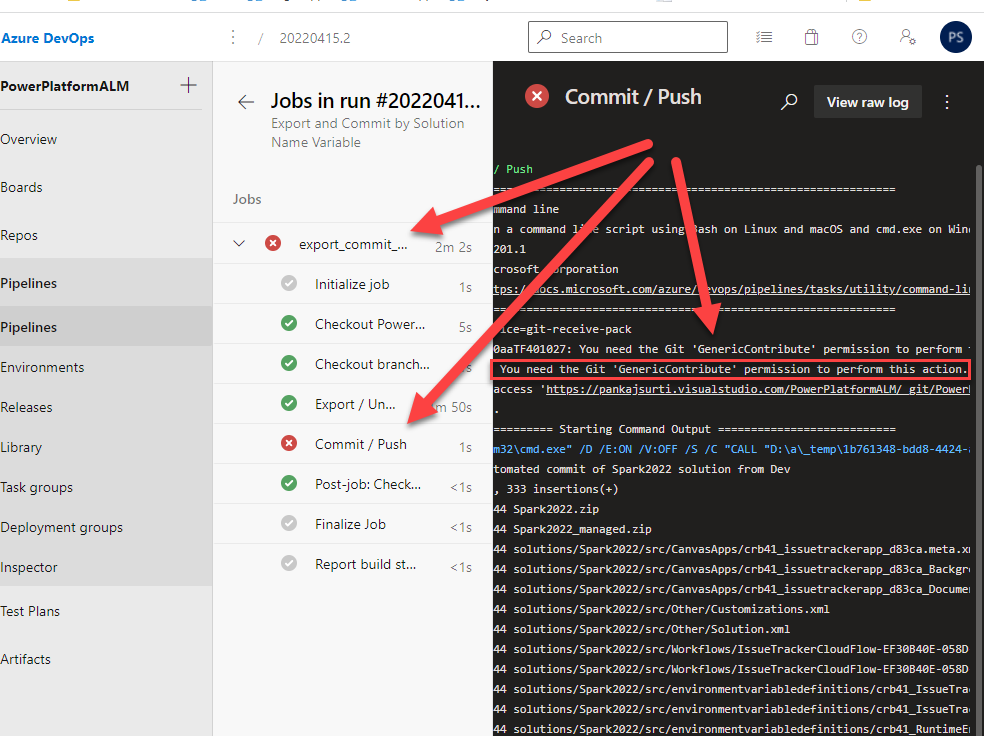
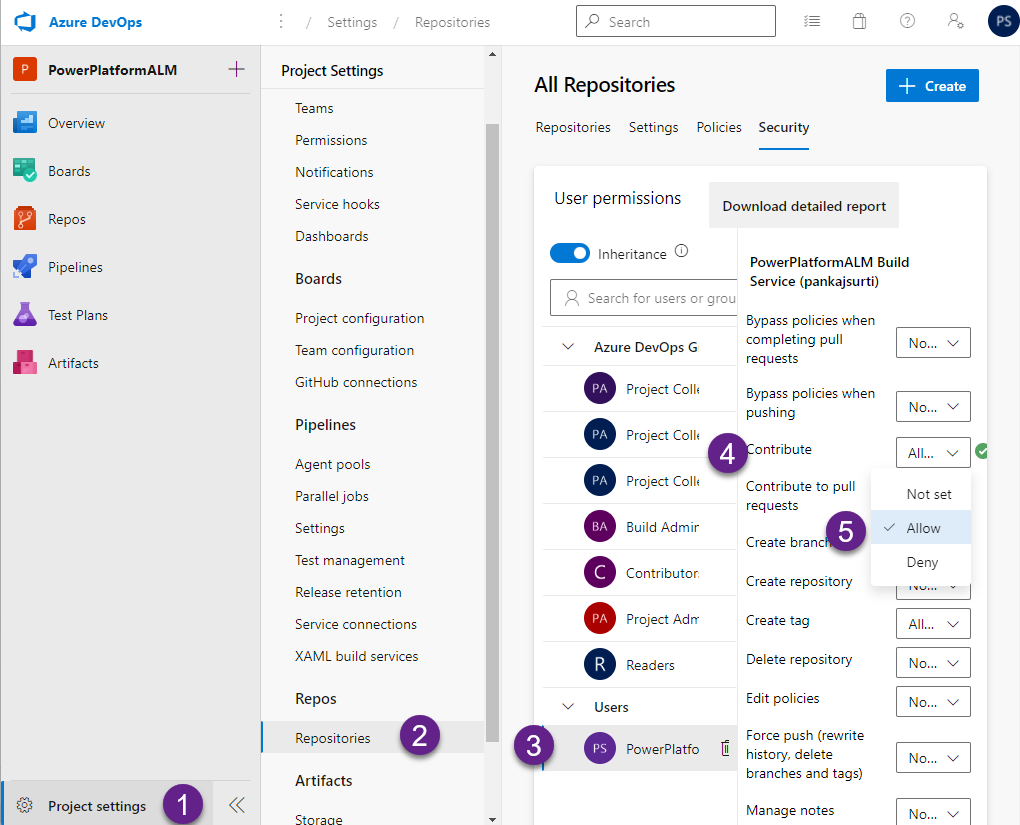
Note: You will get the following error when you run the pipeline. YOU NEED TO set Contribute Allow for the build agent.
“remote: TF401027: You need the Git ‘GenericContribute’ permission to perform this action.”
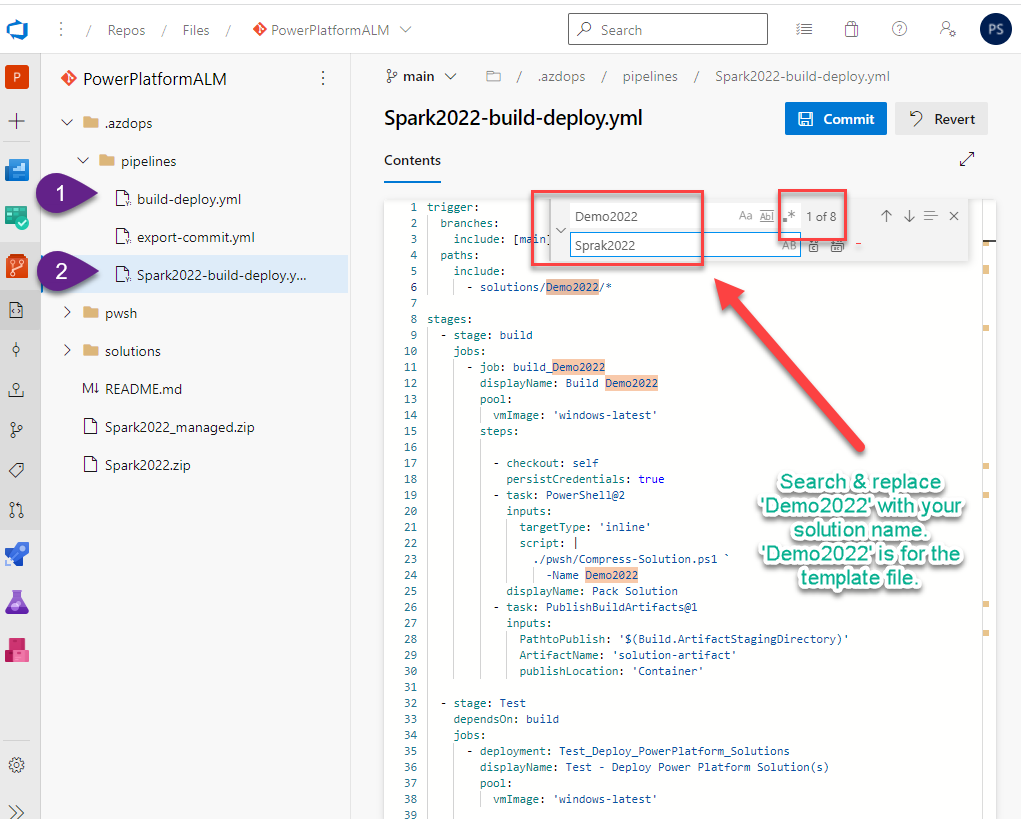
Step # 8 Setup multi-stage build and deploy pipeline for .azdops\pipelines\build-deploy.yml
Consider the file .azdops\pipelines\build-deploy.yml as the template for your Power Platform Solution. From the above example for ‘Spark2022’ solution name I created the copy of the template to a new file named ‘Spark2022-build-deploy.yml’.
Step # 10 Create a Pipeline using the existing file .azdops\pipelines\{YOUR SOLUTION NAME}-build-deploy.yml
Note: You will repeat most of the solution steps from Step # 7 above. Please refer above for the screenshots.
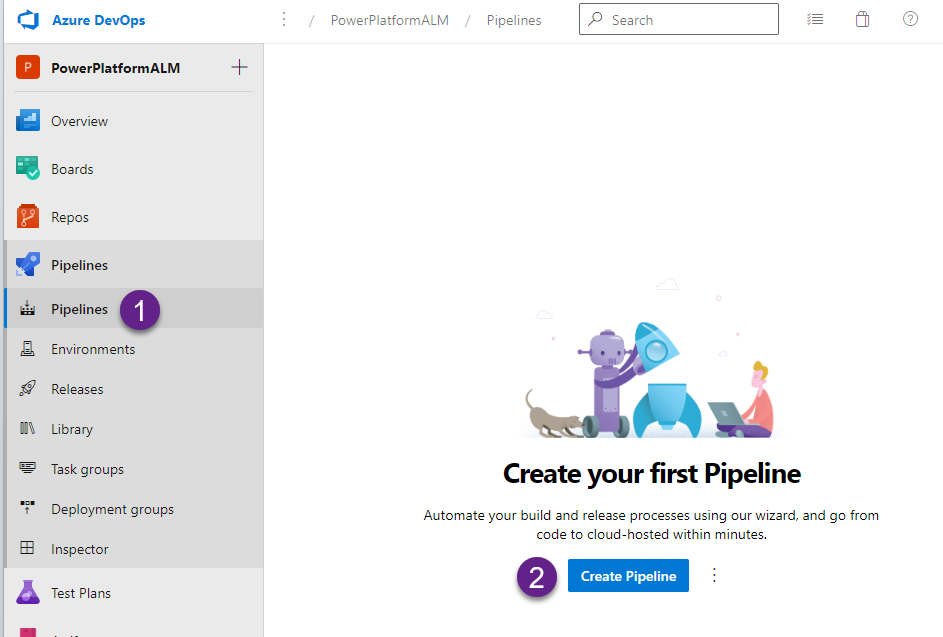
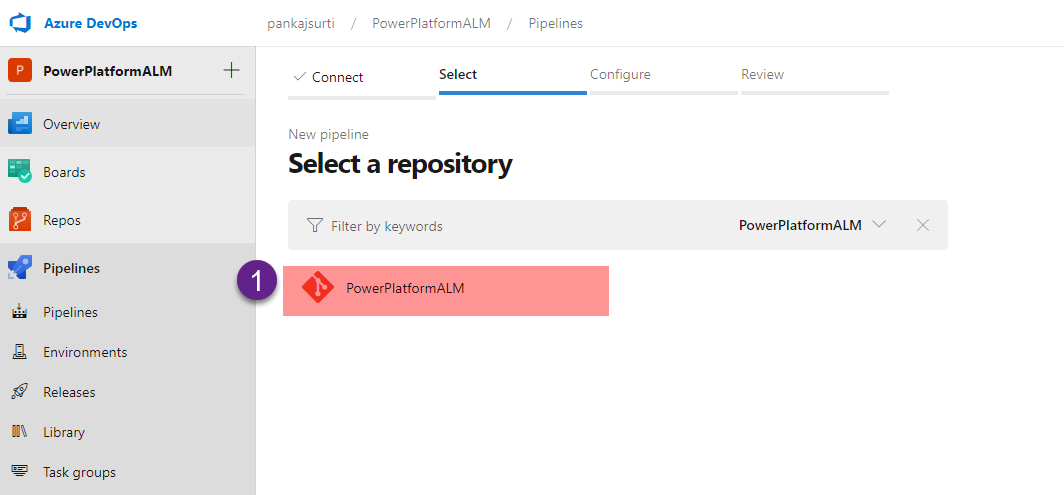
Click on Pipeline, then click the “New pipeline” button.
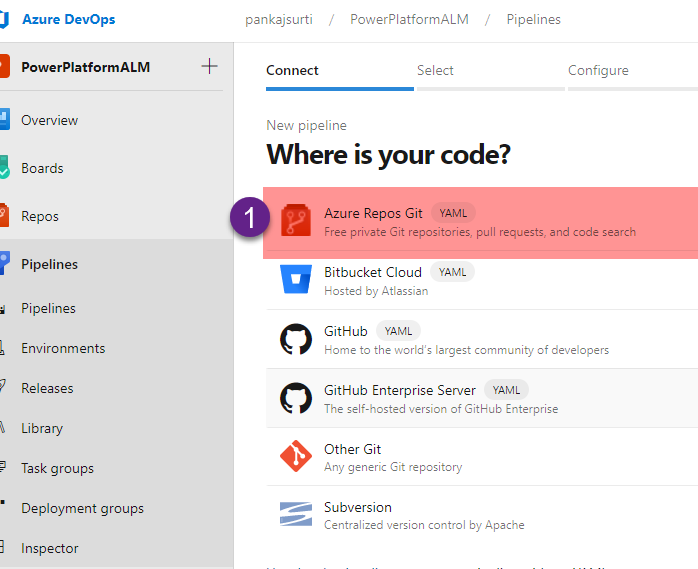
Select Azure Repos Git
Select your specific repository
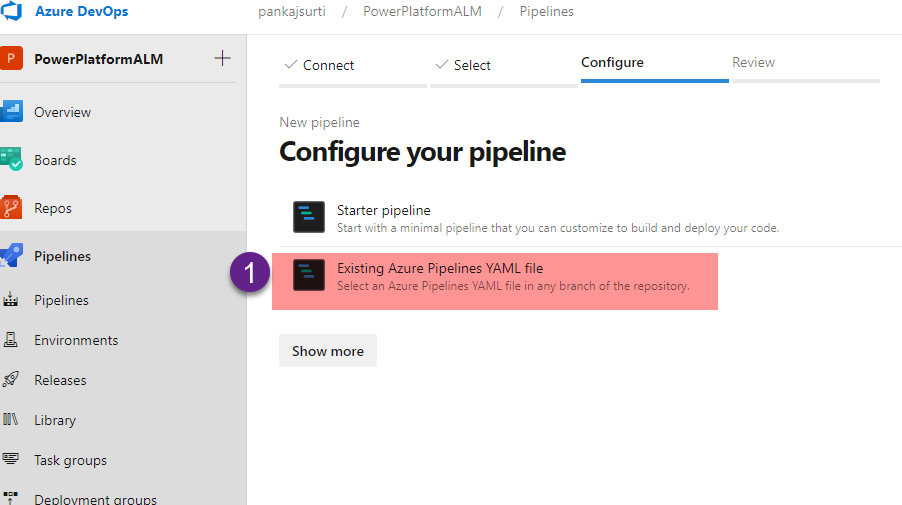
Select the “Existing Azure Pipelines YAML file”
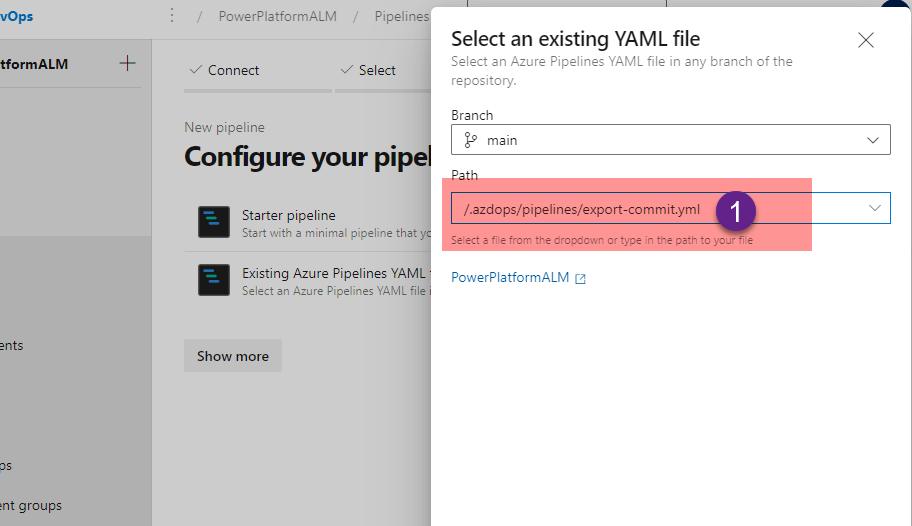
Select the /.azdops/pipelines/{YOURSOLUTIONNAME-build-deploy.yml file. (You created in the step # 8)
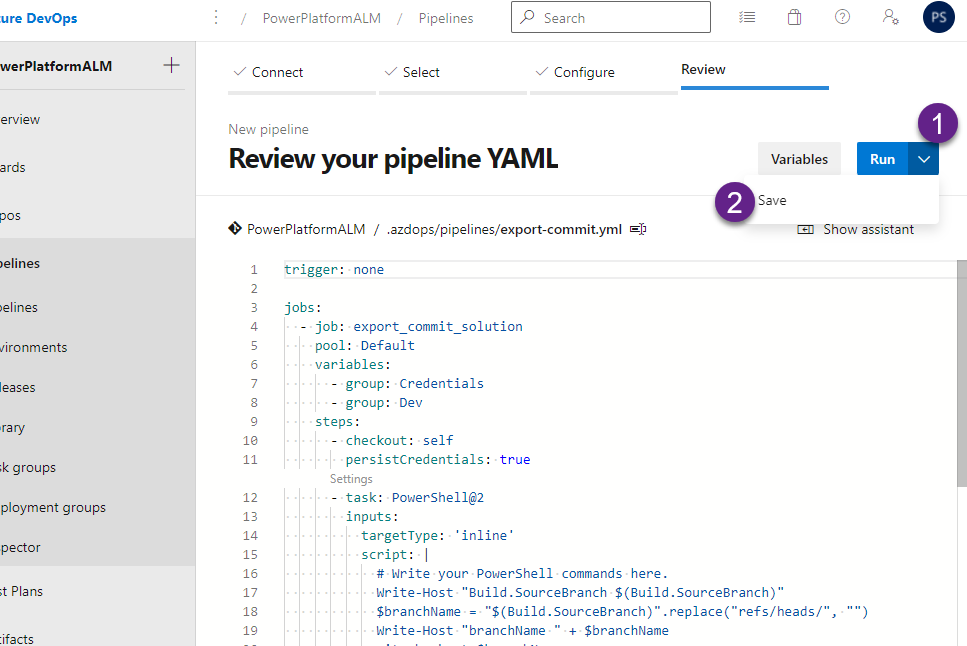
DO NOT Run yet, click on the down arrow next to the Run blue button. Select Save.
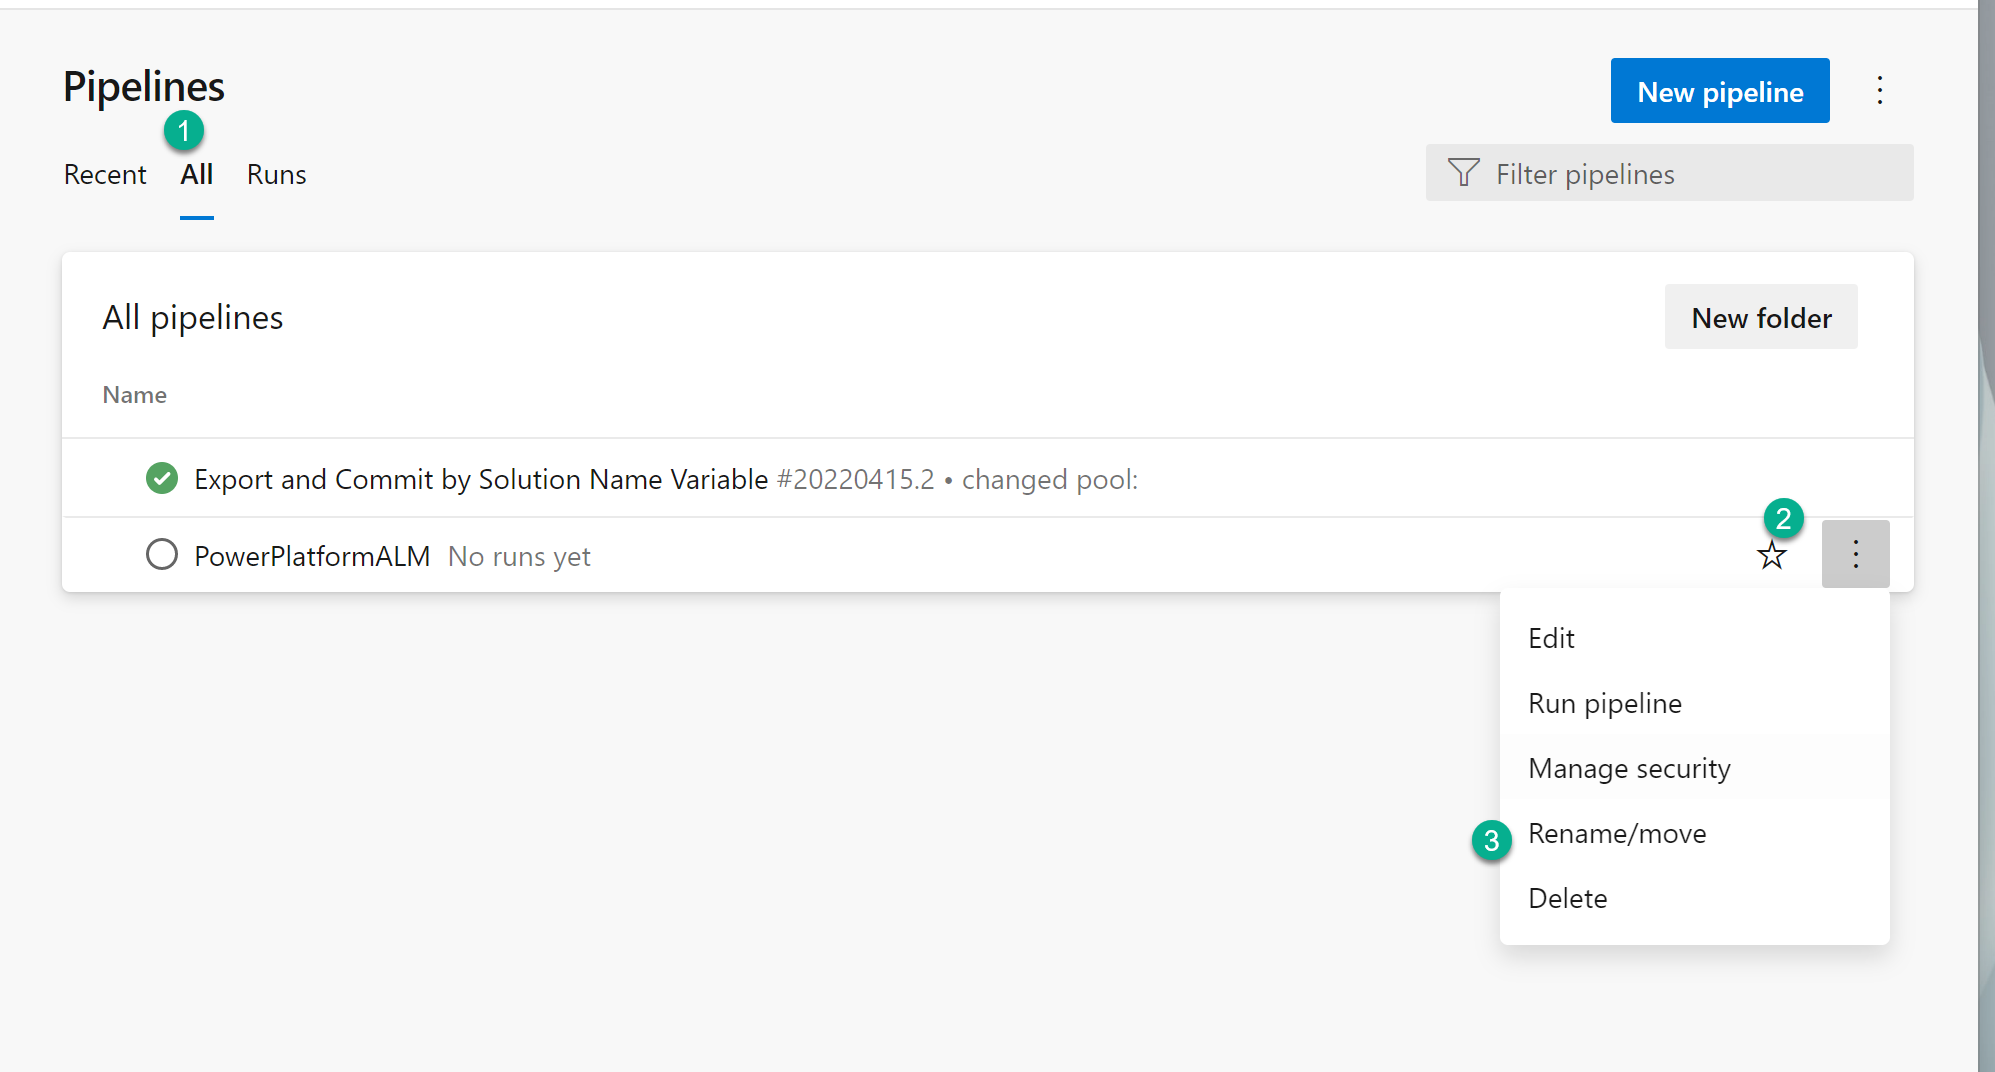
Now click on Pipelines from the left menu. Click on the “All” tab.
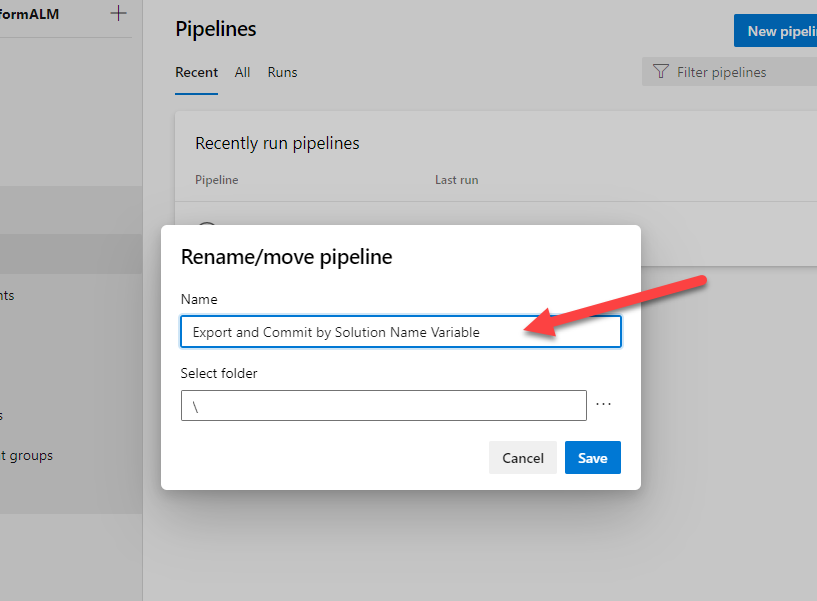
Click on the newly created pipeline to rename, see below.
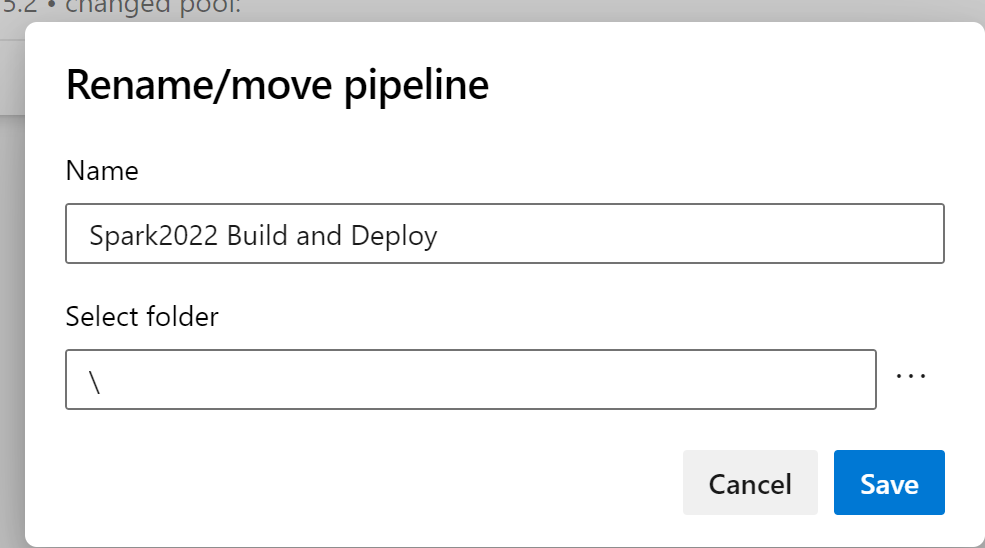
Rename to something like “{YourSolutionName} Build and Deploy”. So for the above example, it would be “Spark2022 Build and Deploy”
Step # 11 Create config.test.json and config.prod.json files (if not present) under the solution folder.
The two config files for the test and prod are under your Solution Folders directory.
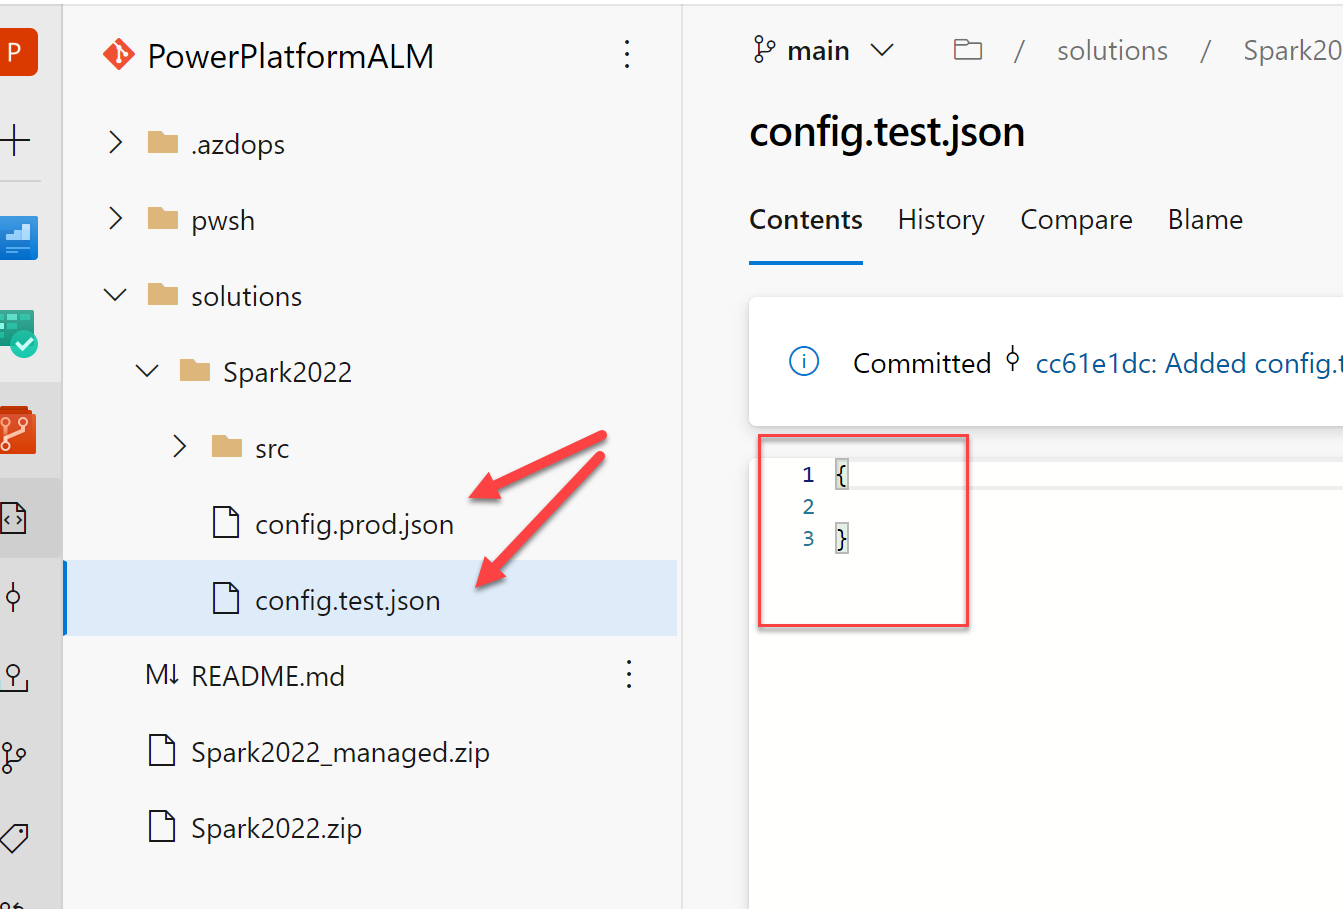
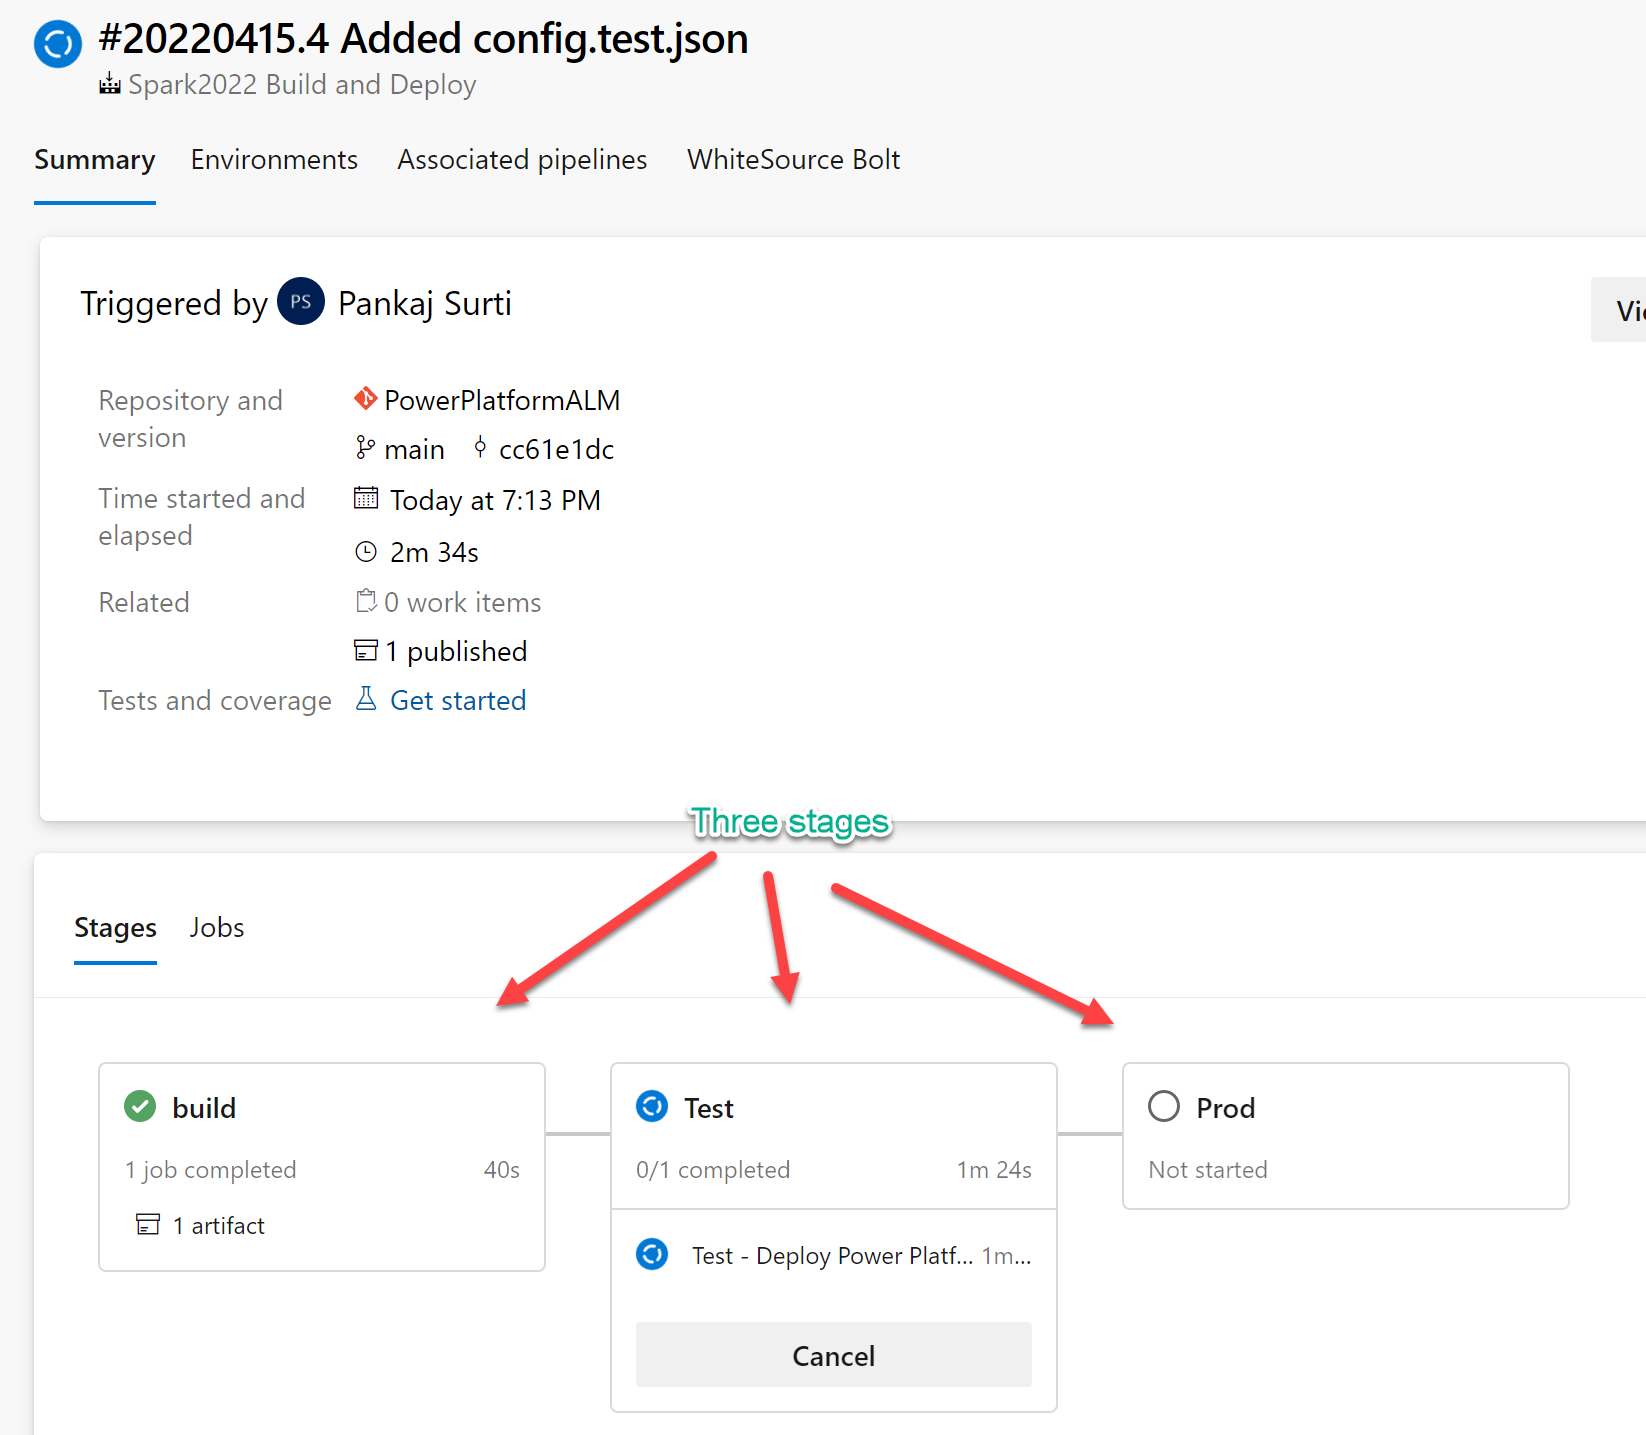
The save of these files will trigger the build if not, run the pipeline, you will see the multi-stage for Build, Test, and Prod
NOTE: In this pipeline, you do not need to set any variable before running it.
Step # 12 Regarding the config.test.json and config.prod.json files.
This is an optional step. You may have environment variables for the connection references, site URL, list guide, etc. These variables are different in each environment. The values for deployment can be configured in the config.ENV.json file.
The trick to getting the content of the JSON file is to make use of the Visual Studio Code pac cli extension.
#
# Use the *unmanged* solution to extract dev config setting.
#
pac solution create-settings --solution-zip Spark2022.zip --settings-file config.dev.json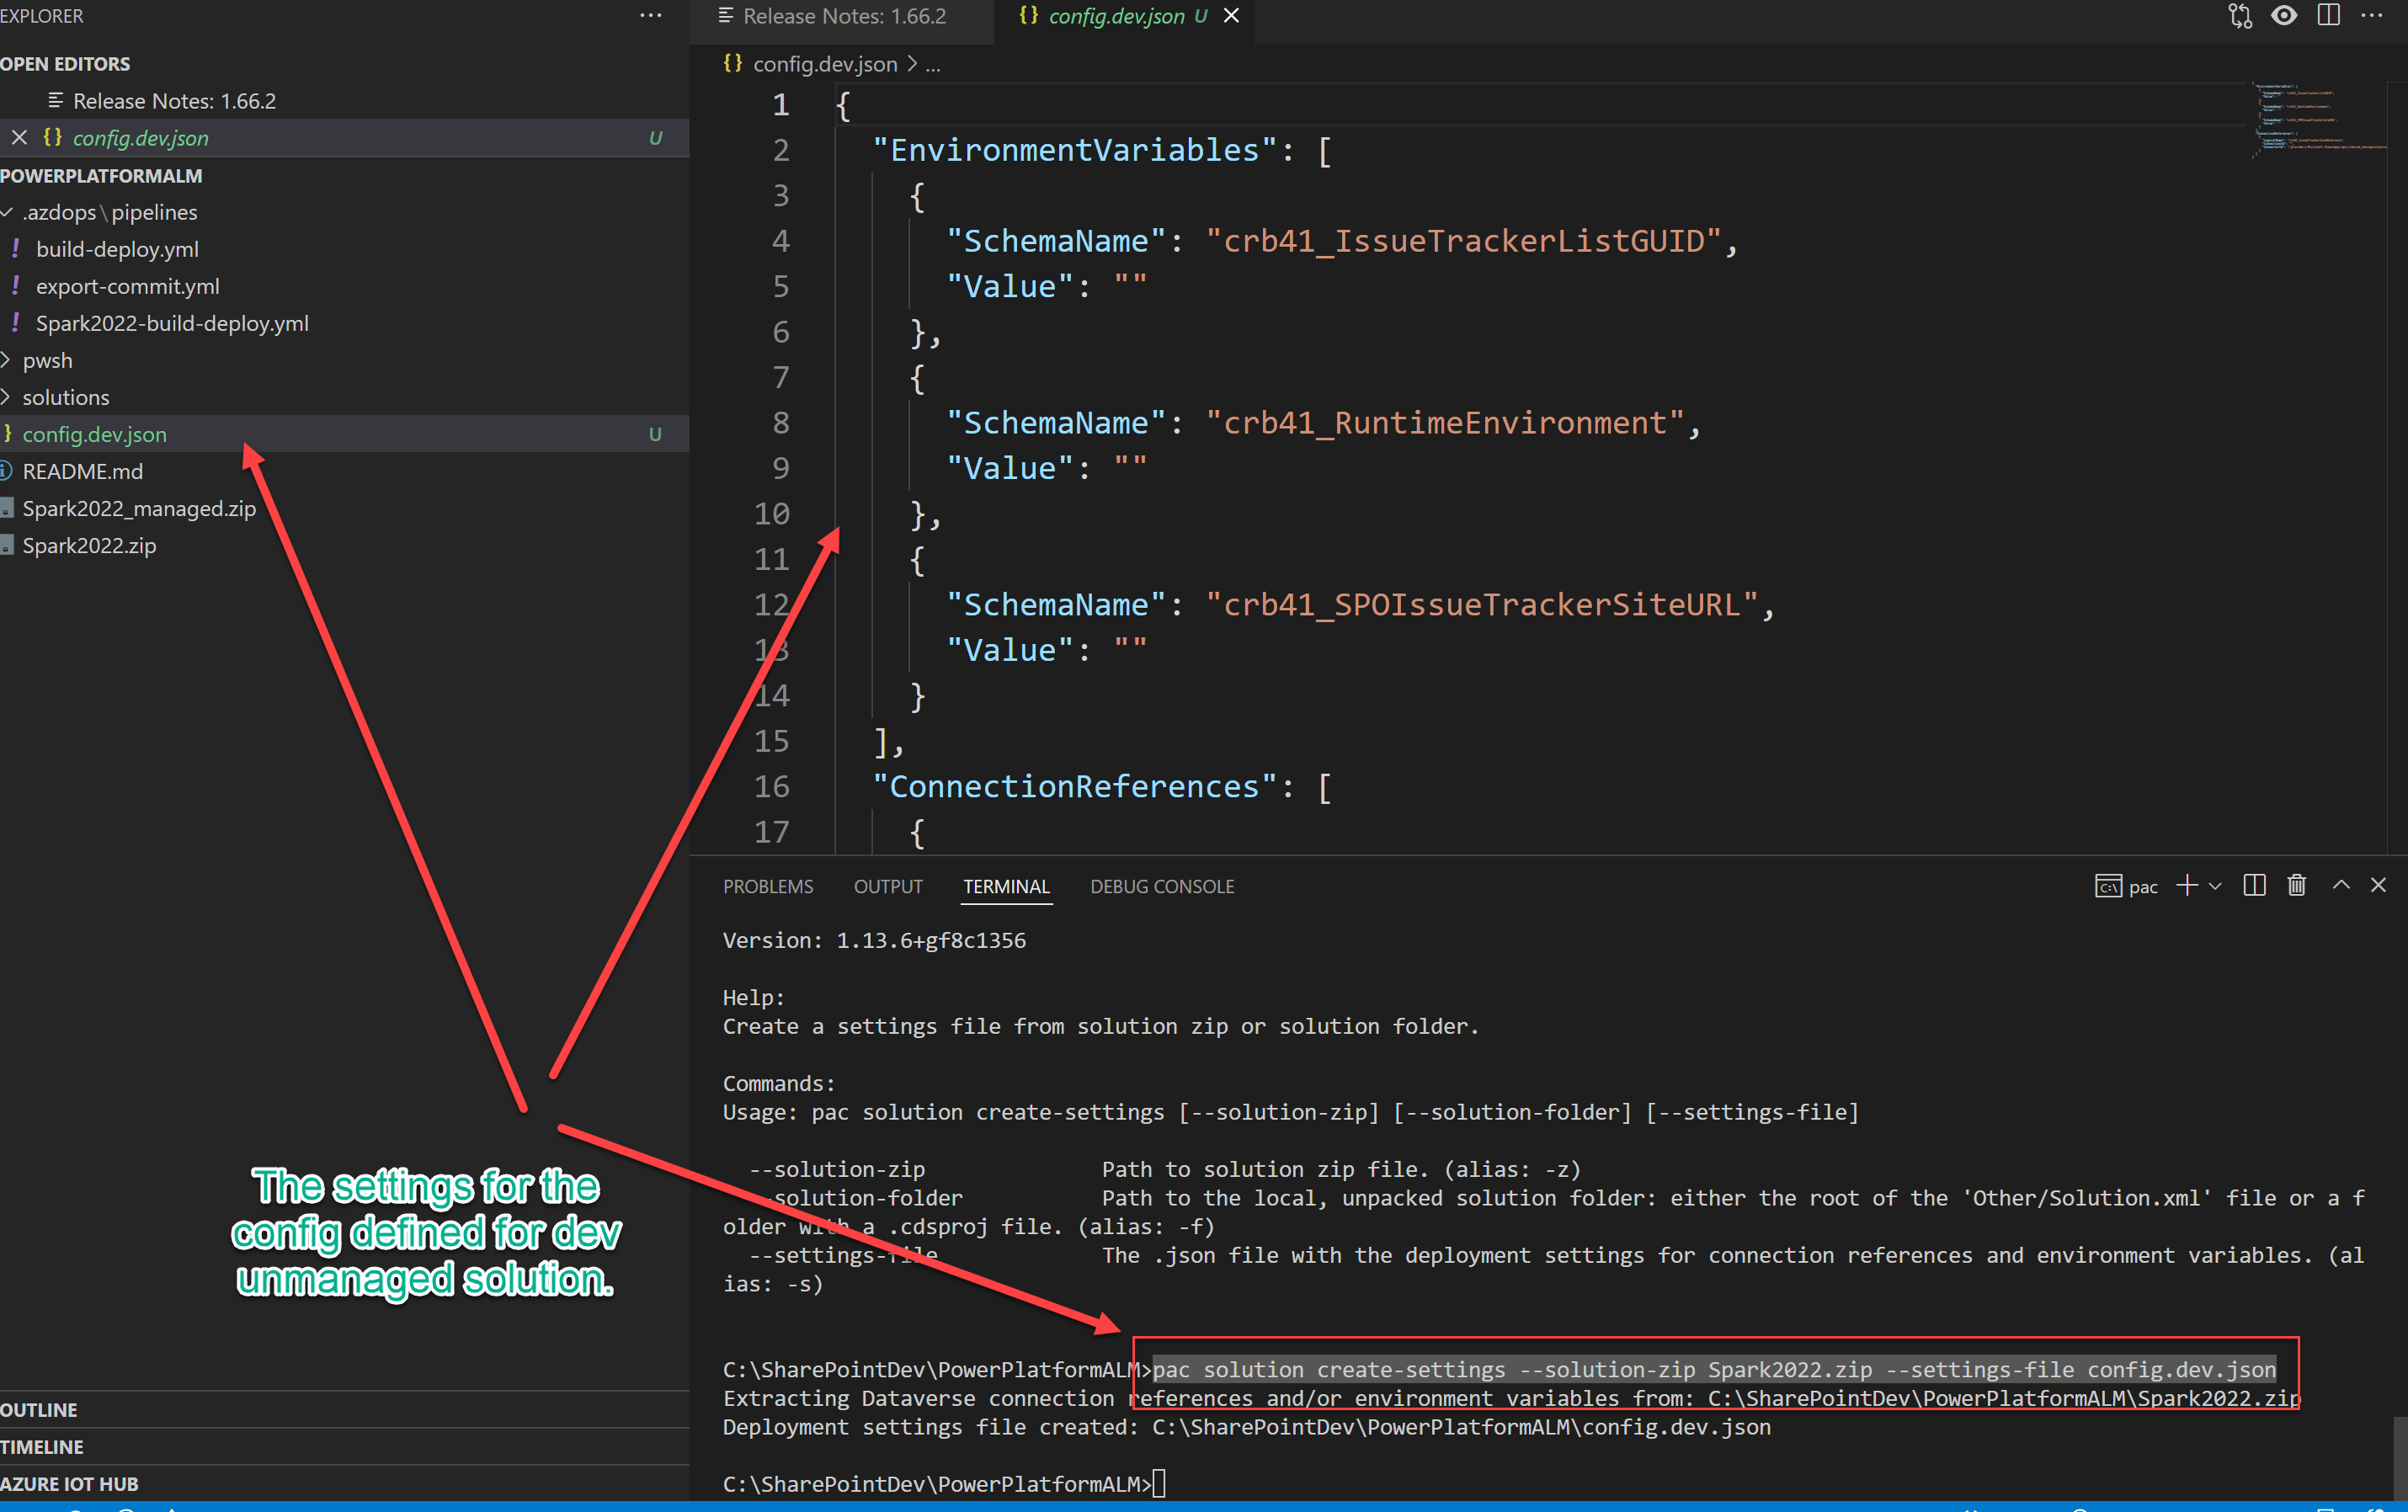
CITIZEN DEVELOPER SCENARIO
All above steps 1 to 12 are for the Build Administrator or Technical lead of the project.
For the Citizen developer’s role, the steps are simple and as follows.
- Gather the requirements or feedback or bugs for the application.
- Create a Power Platform Solution in the Dev Environment e.g. LaptopInventory
- Develop a PowerApps App
- Develop a PowerAutomate Flow
- Creates a List and any other components required for the solution.
- Test the application and flow
- Run Export and Commit Pipeline (export-commit.yml) for the LaptopInventory solution.
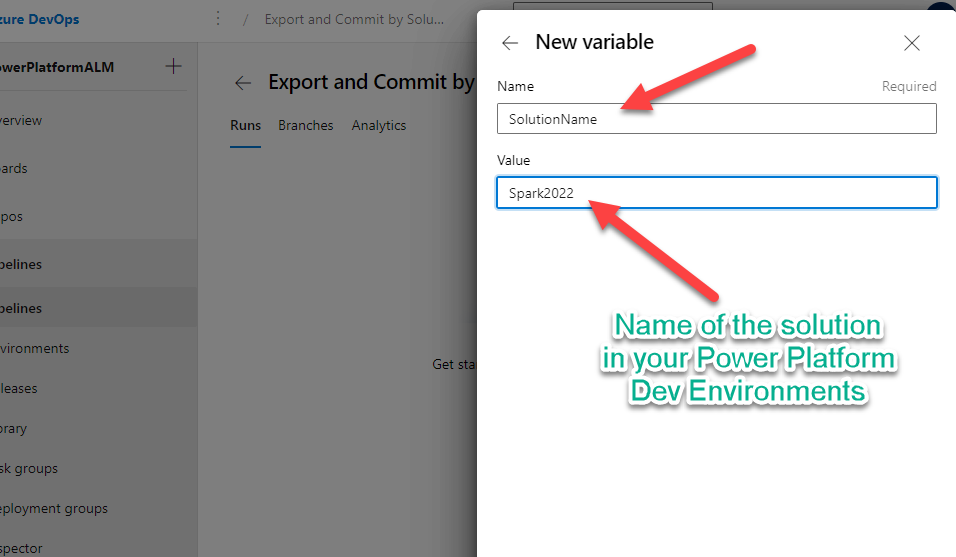
- Note: you need to add a SolutionName=LaptopInventory variable before running the pipeline
- This action will create a new directory ‘LaptopInventory’ in the repository
- Create config.test.json and config.prod.json files with an empty record as {}
- Note: This is a one-time activity. It can be repetitive if you are adding any config variables for various environments.
- Create a Build and Deploy Pipeline for the solution ‘LaptopInventory’ (See Step#8 and Step#9)
- Note: This is a one-time activity
- Make a copy of build-deploy.yml to LaptopInventory.yml in the ‘.azdops\piplelines‘ folder
- Change the text from ‘Demo2022’ to the ‘LaptopInventory’
- Create a Pipeline using the new YML file
- Run the pipeline if it is not running already. (This action will make the Solution available in the Test Environments)
- Ask Testers to test and provide feedback.
- Repeat the above steps from here as needed for the ALM cycle.
The below flow chart gives an overview of the process. The developers run the “Export & Commit” by the SolutionName. This action “1” exports the Solution and Commits to the Source Control Managemen (SCM). The checking in the file(s) for the solution auto triggers the “Build & Release” pipeline which eventually put the managed solution in the TEST or PROD environments.
Depending on the feedback from the testers the above process is repeated by the developer.

Conclusion
This concludes the 3 parts blog series for Application Lifecycle Management for Power Platform.
Please refer to the following articles for more information.
YAML schema reference for Azure Pipelines
Move flows across environments without resetting connections! (Please use connection references in your solutions)
Power Platform Environment variables overview
Azure DevOps CODE: microsoft-power-platform-ce/spark-prodev-practice (This blog post made use of most of the code from this repo)
GitHub Actions CODE: melody-universe/levelup-devops (If you plan to use the GitHub actions this repo can be a good start)
Introducing the ALM Accelerator for Power Platform
Thank you Melody Universe and Paul Breuler for your code and knowledge sharing.

very nice Pankaj!!