
Application Lifecycle Management (ALM) for Power Platform (PP) 1 of 3
Application Lifecycle Management (ALM) for Power Platform (PP) 3 of 3
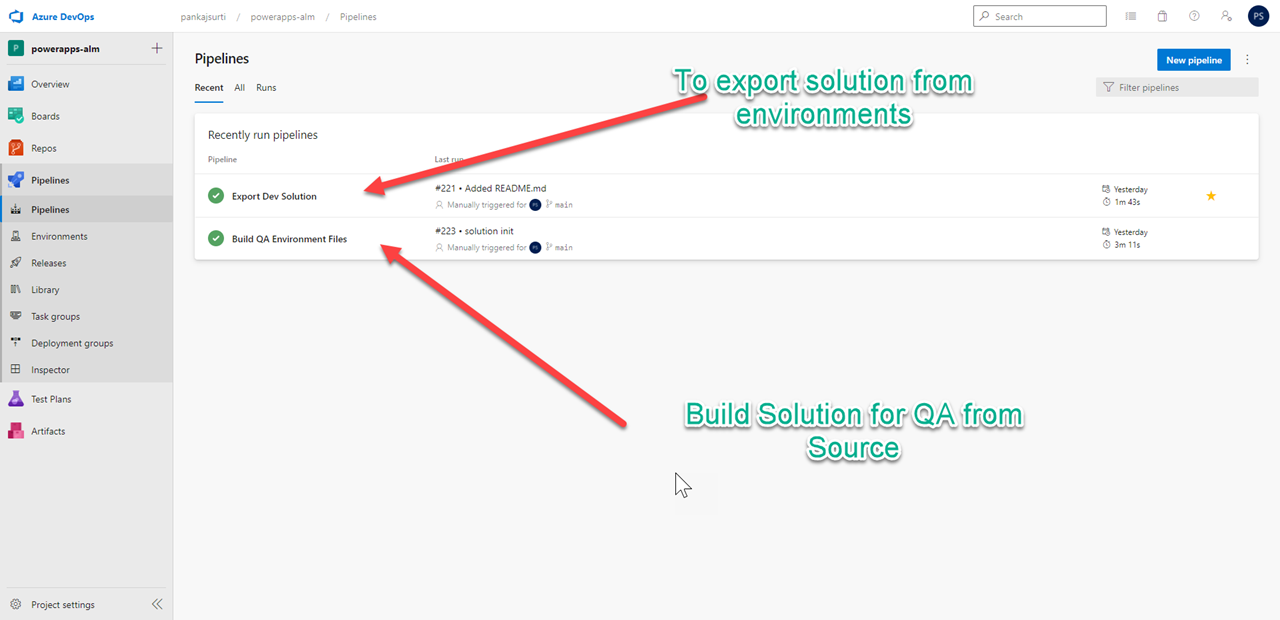
You will have two build pipelines and one release pipeline.
1. Create two build pipelines
Follow the following steps to create a pipeline.
Click on Newpiple
Select the “Use the classic editor” link
Select Azure Repos Git. Select the Team project, Repository, and branch main.
Select “Empty Job”
Name the pipeline
2. Add SolutionName as Build variable
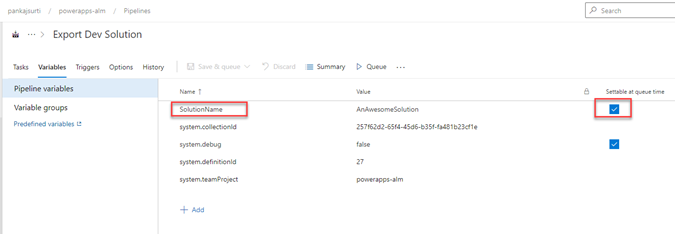
Select “Selectable at queue time” and “Selectable at release time”
3. Create “Export Dev Solution” Build pipeline

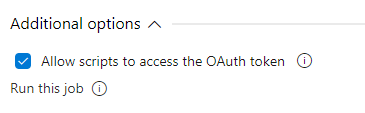
Please make sure you have “Allow scripts to access the OAuth token” is checked for the Agent Job.
** Use the values from here to put in the actions input **

Power Platform Export Solution
Solution Name : $(SolutionName)
Solution Output File : $(Build.ArtifactStagingDirectory)\$(SolutionName).zip
UNSELECT EXPORT AS MANAGE SOLUTION

Power Platform Unpack Solution
Solution Input File = $(Build.ArtifactStagingDirectory)\$(SolutionName).zip
Target Folder to Unpack Solution : $(Build.SourcesDirectory)\$(SolutionName)

Command Line Script

Display name: Command Line Script

Script :
echo commit all changed
git config user.email "pankaj_surti@hotmail.com"
git config user.name "Automatic Build"
git checkout main
git add --all
git commit -m "solution init"

echo push code to new repo
git -c http.extraheader="AUTHORIZATION:bearer $(System.AccessToken)" push origin main

NOTE:
To make the above script work you must give the contribute allow access to the Build service under project settings.
Please refer to 1 of 2 (Prerequisites) step # 6 "Add Build Service as Contribute Allow permission for the new repository"
4. Create “Build QA Environment Files” Build Pipeline

Power Platform Pack Solution

Source Folder of Solution to Pack = $(Build.SourcesDirectory)\$(SolutionName)
Solution Output File = $(Build.ArtifactStagingDirectory)\$(SolutionName).zip
Type of Solution : Unmanaged

Power Platform Import Solution
Solution Input File = $(Build.ArtifactStagingDirectory)\$(SolutionName).zip

Power Platform Export Solution
Solution Name : $(SolutionName)
Solution Output File : $(Build.ArtifactStagingDirectory)\$(SolutionName)_managed.zip
SELECT EXPORT AS MANAGE SOLUTION

Publish Artifact: drop

Path to publish = $(Build.ArtifactStagingDirectory)
Artifact name = drop
Artifact publish location = Azure Pipelines
Reference: Predefined variables – Azure Pipelines | Microsoft Docs
5. Create Release to production
To create release pipeline follow the steps.
Click on Pipelines->Rlease.
Click on “New pipeline”
Select “Empty Job”
Select “Add an artifact”
Select Project.
Select Source (build pipeline) as “Build QA Environments”
Select Default version as “Latest”
Type Source alias as “Build”

Now select Stage 1 and add two shown actions.
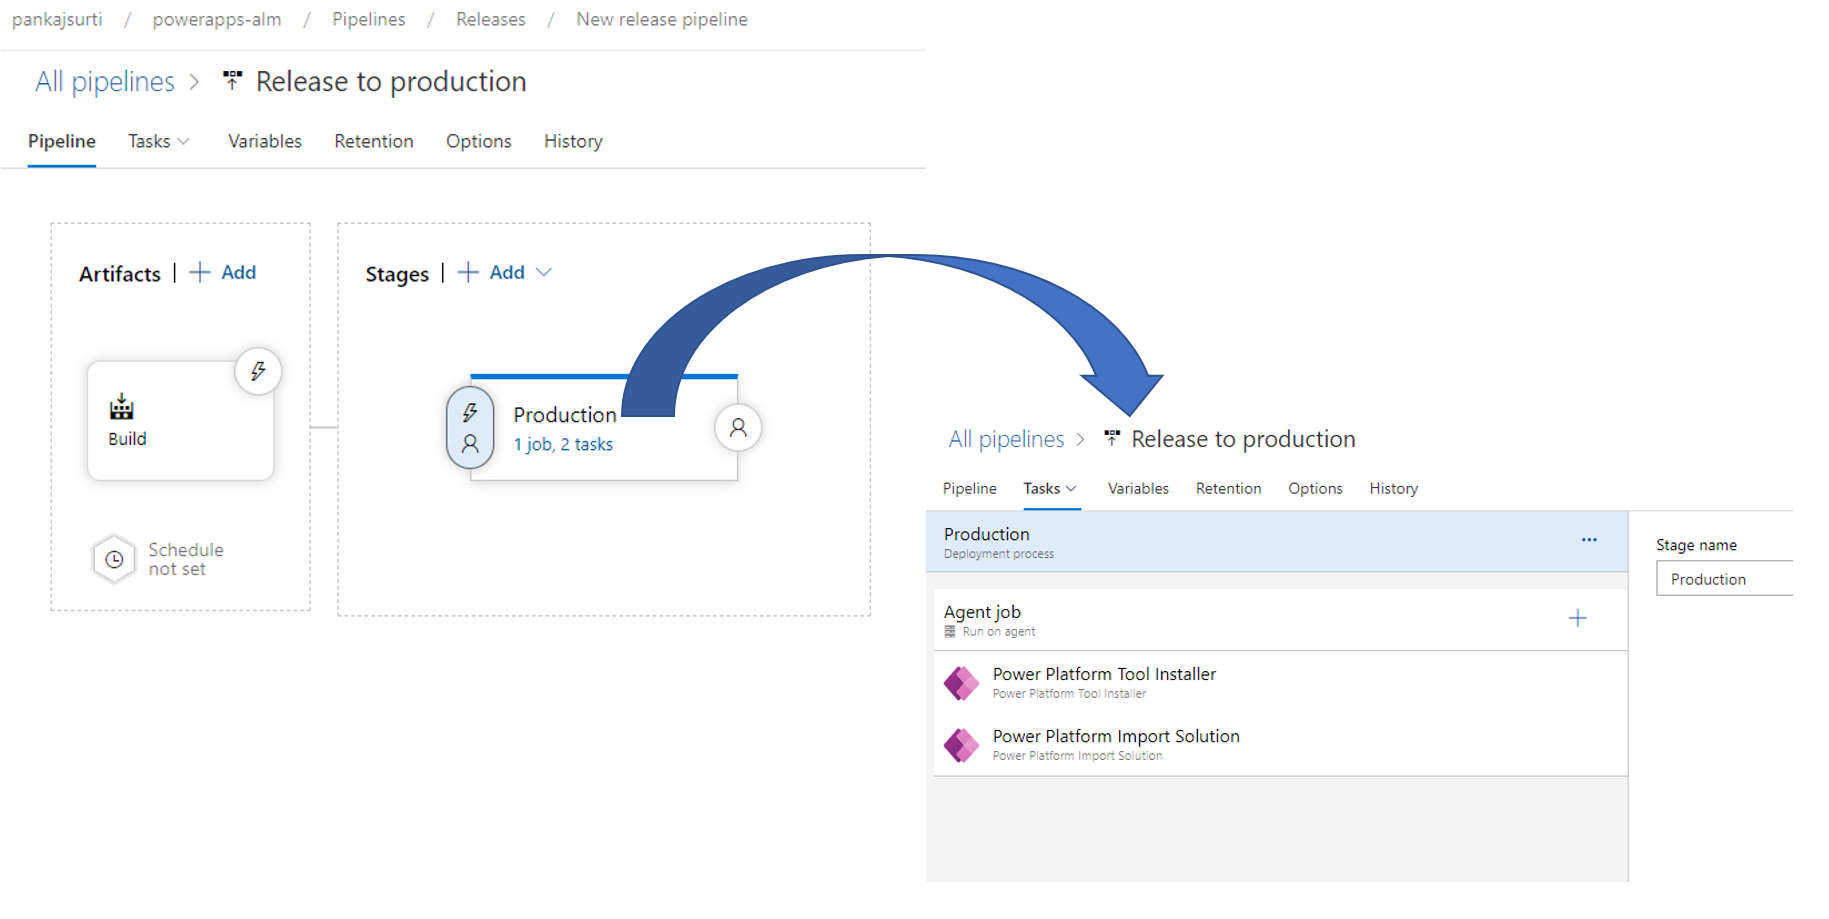
Power Platform Import Solution
Service connection: PROD


Solution Input File = $(System.DefaultWorkingDirectory)/Build/drop/$(SolutionName)_managed.zip
The following code can be used in your Power Apps to extract the environment variable.
UpdateContext(
    {
        txtEnvVar: LookUp(
            'Environment Variable Values',
            'Environment Variable Definition'.'Schema Name' = "new_RuntimeEnvironment"
        ).Value
    }
)
To Change the environments variables for the managed solution.
The managed solution will be in locked mode and you will not be able to change the environment variables. The following are the steps to change the environments variables.
Navigate to the PROD environments using Power Platform Admin Center
Click on the Tables under Dataverse on the left side menu
Search for ‘Environment Variable Value’
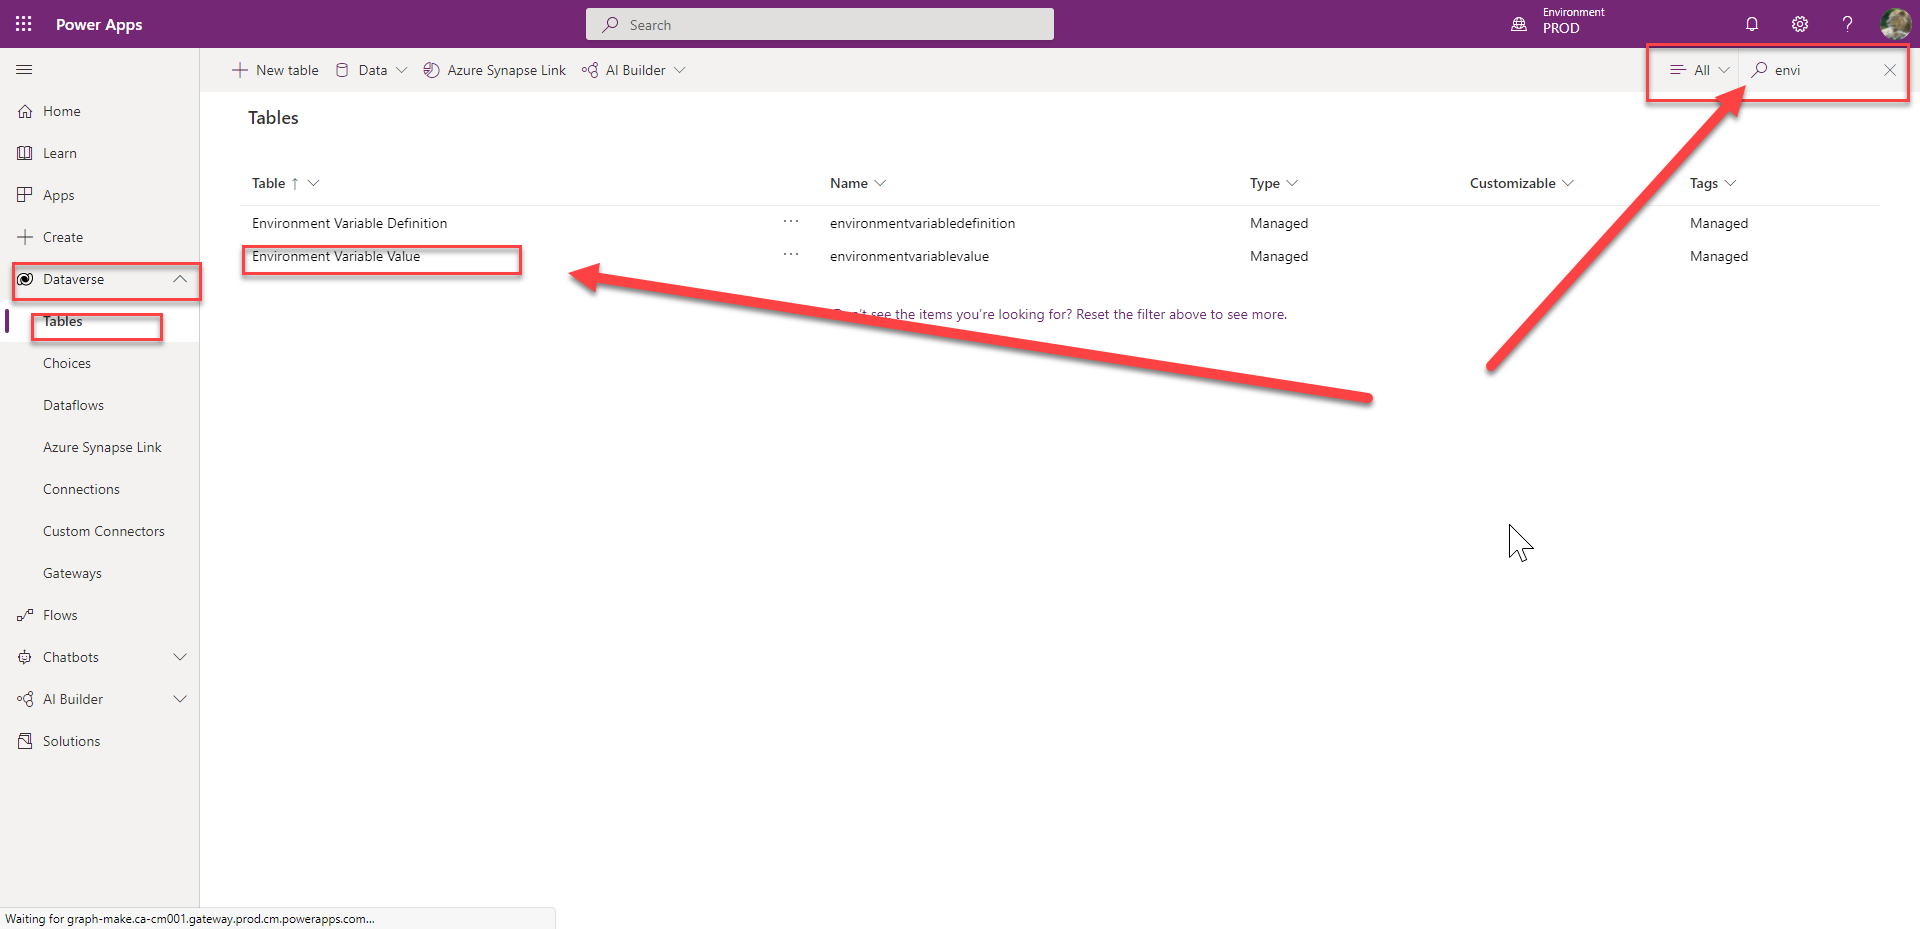
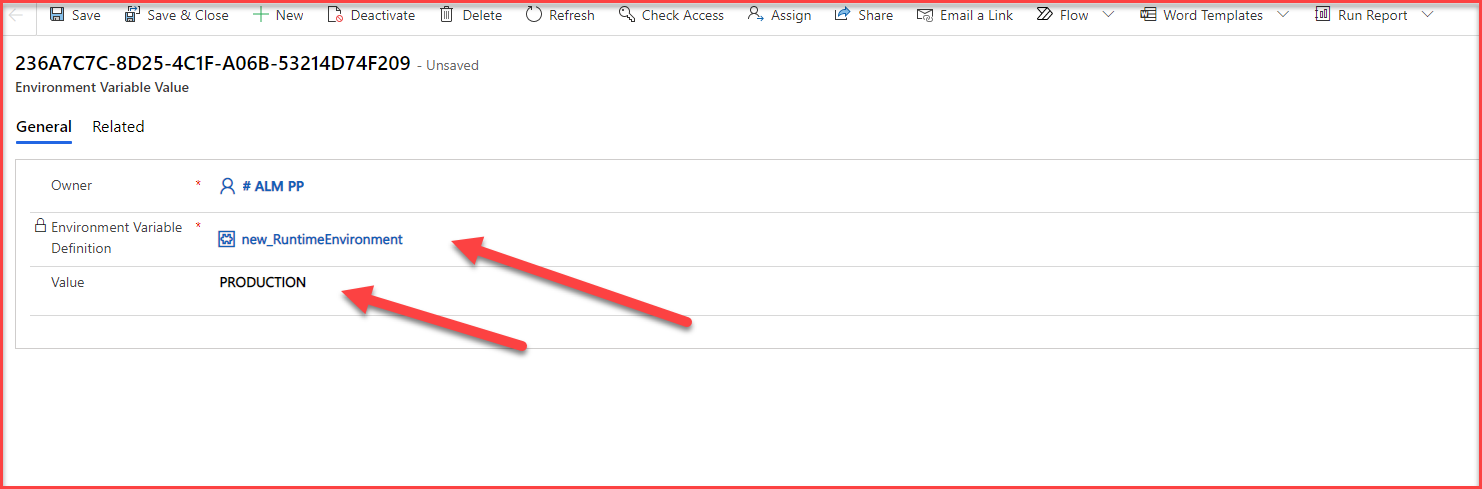
Click on the ‘Environment Variable Value’ table and navigate to the ‘Data’ tab (as shown below)

For more details follow the following lab materials.
Microsoft Power Platform Build Tools for Azure DevOps
Microsoft Power Platform Build Tools for Azure DevOps – Power Platform | Microsoft Docs
Application Lifecycle Management (ALM) for Power Platform (PP) 3 of 3

Pingback: Application Lifecycle Management (ALM) for Power Platform (PP) 1 of 2 | Pankaj Surti's Blog