
Summary
To provide granular access for the sites the Azure Access Control (ACS) was used in the past. The app id and secret can be created using the add-ins, more info is described here. Note: Please check ACS retirement info.
Now with the new Sites.Selected MS Graph permission you can use the granular level permission. This blog post is just to simplify and demonstrate the use of PnP PowerShell to create granular permissions.
For example, if the customer wants to have access to a few sites as a read permissions the “Site.Selected” permission techniques can be used to meet the need.
Step by Step Solution
Step # 1 Create Azure AD app with MS Graph Sites.FullControl.All permission
NOTE: Make sure you select MS Graph not SharePoint, as it also has the same permission but that is not valid.
Please make a note of the application id.

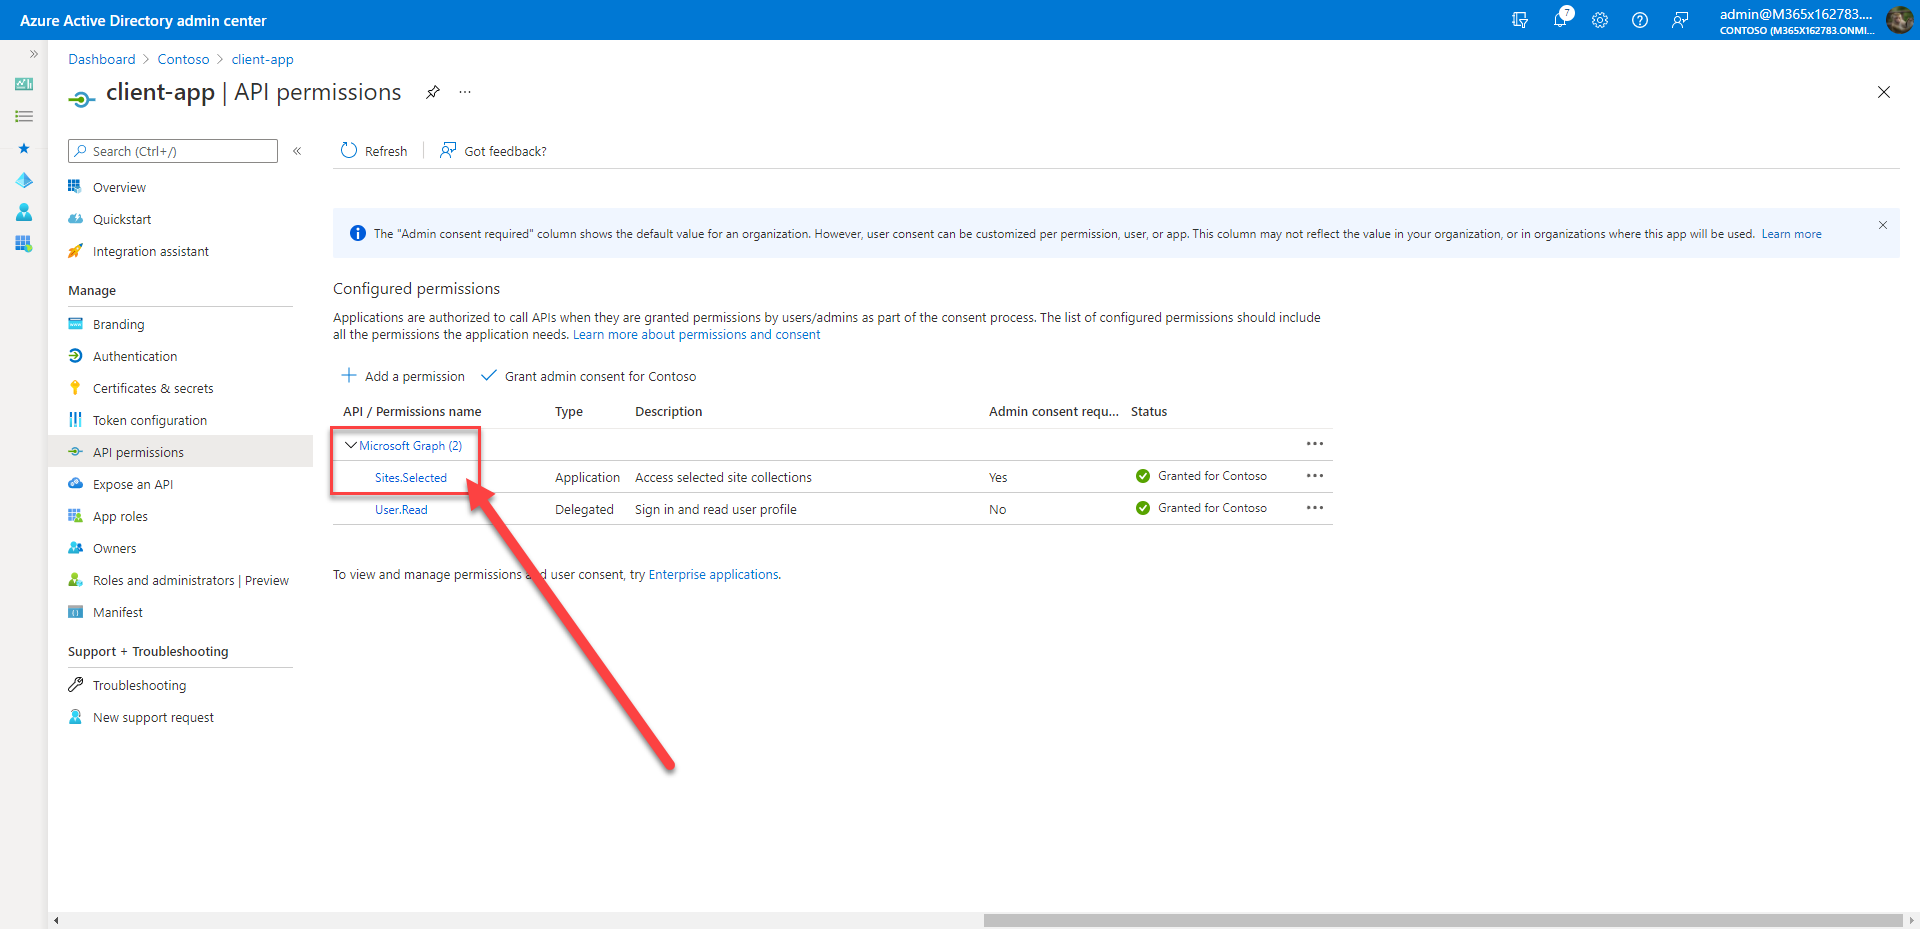
Step # 2 Create Azure AD app with MS Graph Sites.Selected permission

Step # 3 Create a PFX and CER certificate using PnP PowerShell.
New-PnPAzureCertificate -OutPfx pnpSites-Selected.pfx -OutCert pnpSites-Selected.cer -CertificatePassword (ConvertTo-SecureString -String "pass@word1" -AsPlainText -Force)The above command will create two files, store them in the known directory.
Step # 4 Upload the CER file to the Azure AD app created in Step #1 i.e. Admin app.
Step # 5 Using PnP PowerShell command Grant-PnPAzureADAppSitePermission
$adminAppId = "9a6f4c8a-e9cf-44fd-b3ad-4413ed66a2ce"; #admin-app TODO to replace
$clientAppId = "ca2a60c7-d09a-4875-841b-117a02b504fd"; #client-app

$tenantPrefix = "M365x162783"; # replace with your tenant id TODO to replace
$tenantName = $tenantPrefix +".onmicrosoft.com";
$spoTenantName = "https://" + $tenantPrefix + ".sharepoint.com";

# site to apply granular permission,
# it can be repeated for more than one sites
$site2apply = "https://m365x162783.sharepoint.com/sites/lbtest1"

$password = (ConvertTo-SecureString -AsPlainText 'pass@word1' -Force)

$adminConn = Connect-PnPOnline -Url $spoTenantName -ClientId $adminAppId -CertificatePath 'c:\Temp\pnpSites-Selected.pfx' -CertificatePassword $password  -Tenant $tenantName


#### GRANT
Grant-PnPAzureADAppSitePermission -AppId $clientAppId -DisplayName "Thisapp" -Permissions Read -Site $site2apply -Verbose
Step # 6 To check the client app has an access to read lists of the site
$clientAppId = "ca2a60c7-d09a-4875-841b-117a02b504fd"; #client-app

$tenantPrefix = "M365x162783"; # replace with your tenant id TODO to replace
$tenantName = $tenantPrefix +".onmicrosoft.com";

$site2apply = "https://m365x162783.sharepoint.com/sites/lbtest1"

$clientConn = Connect-PnPOnline -Url $site2apply -ClientId $clientAppId -CertificatePath 'c:\Temp\pnpSites-Selected.pfx' -CertificatePassword $password  -Tenant $tenantName

Get-PnPList
Click here to see the code for how to read all lists using non-PnP command i.e. REST calls.
Step # 7 To change the permission from “Read” to “Write”.
NOTE: The following code is an extension from the above code variables set in the above steps.
#### GET
$perms = Get-PnPAzureADAppSitePermission -Site $site2apply

#### SET
Set-PnPAzureADAppSitePermission -Site $site2apply -Permissions Write -PermissionId $perms.Id
Step # 8 To revoke the permission.
NOTE: The following code is an extension from the above code variables set in the above steps.
#### GET
$perms = Get-PnPAzureADAppSitePermission -Site $site2apply

#### REVOKE
Revoke-PnPAzureADAppSitePermission -Site $site2apply -PermissionId $perms.Id
Conclusion
The granular access to sites using Sites.Selected can be achieved using the PnP.PowerShell module.
Please see the next follow up article.
I have used code REST related call in Step # 6 from Srinivas’s blog

Pingback: The tenant-wide flag DisableCustomAppAuthentication in relation to Access Control System (ACS)? | Pankaj Surti's Blog
Hello, thanks for the information. It worked fine in our test environment, so unless now we can use this feature for some developments were asking full access! Just one thing: For the step #6 we had to create a second certificate and then be uploaded into the client app. Otherwise we have to upload the certificate created in step #1 in both Azure apps… Don’t know if it is the right process, or better to separate the admin and client certificates and authentication process. Thank you anyway!
Always use a separate certificatess.
Pingback: Power Platform & M365 Dev Community Call – July 7th, 2022 – Screenshot Summary - Warner Digital - David Warner II
Pingback: How to automate and govern the “Sites.Selected” permissions using a custom tool? | Pankaj Surti's Blog
Reblogged this on madhavan.
Hello, thanks for the information.We are trying to use the steps in this article but get the following error at step 7:
Get-PnPAzureADAppSitePermission : Access denied
The “Get-PnPList” in the previous step works, so we are able to confirm that we have the read rights with the client app.
Any idea why we get this error. Thanks in advance for answering my question.
Hi Pankaj,
I was trying to follow the steps but when trying to execute Get-PnPAzureADAppSitePermission with admin connection I am getting Access denied as mentioned by Robin also . So can you please suggest what could be the issue.
Thank you, Pankaj. I found this post on Sites.Selected permissions topic is very helpful. The step-by-step explanation is clear and well-organized. I appreciate your effort.
Thank you Pankaj, Very informative and helpful.