
Summary
To customize a SharePoint list or library form by using Power Apps is well documented. You can visit this link to see the details. But the issue with this approach is the form does not work as the full-screen mode app. You may want to create a blank canvas app in full-screen tablet mode.
If you want to associate your existing full-screen canvas app with the SharePoint list, please read further…
Step By Step Solution
The solution is very simple, you still need to create a custom form as mentioned in the above link. You will change the SharePointIntegration Controls OnNew, OneEdit, and OnView properties to launch your full-screen canvas app. You would use the Launch method.
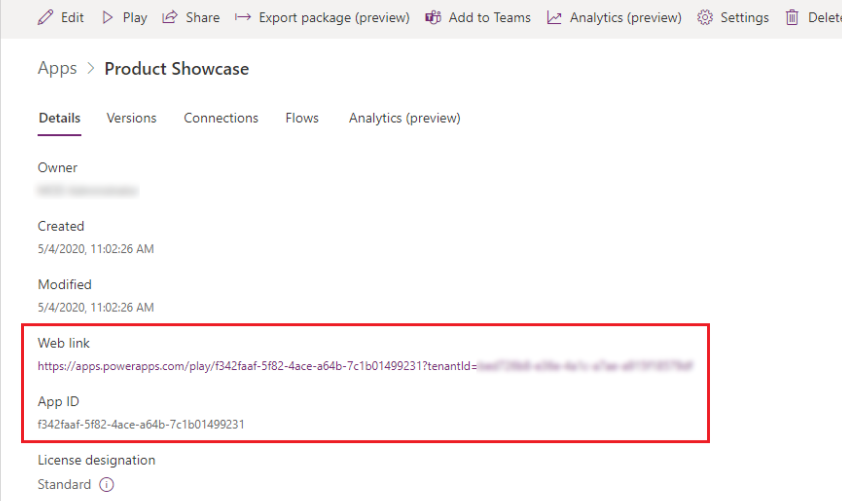
Step # 1 Get the Launch URL for your Full-Screen Canvas app. Follow here
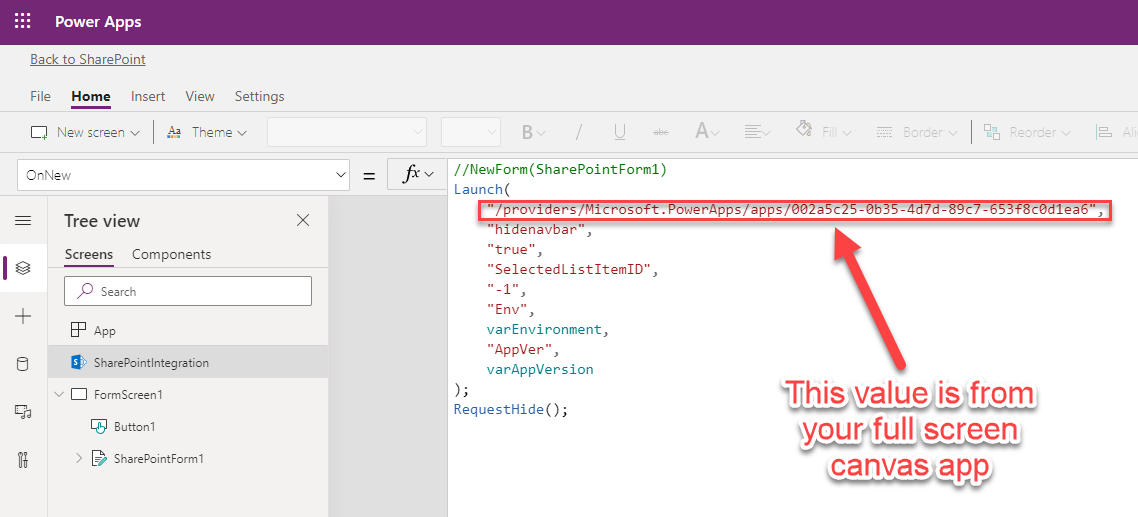
Step # 2 In your customize app go to SharePointIntegration Control. Modify OnNew with the code as defined below.
Note: there are four query strings passed to the launch.
hidenavbar -> is to hide the navigation bar for your full-screen app.
SelectedListItemID -> This will be used in the full-screen app to navigate used to NewForm, EditForm or ViewForm
Env and AppVer -> These are optional if you want to pass some environment or version information. You can skip if you like.
//NewForm(SharePointForm1)
Launch(
"/providers/Microsoft.PowerApps/apps/002a5c25-0b35-4d7d-89c7-653f8c0d1ea6",
"hidenavbar",
"true",
"SelectedListItemID",
"-1",
"Env",
varEnvironment,
"AppVer",
varAppVersion
);
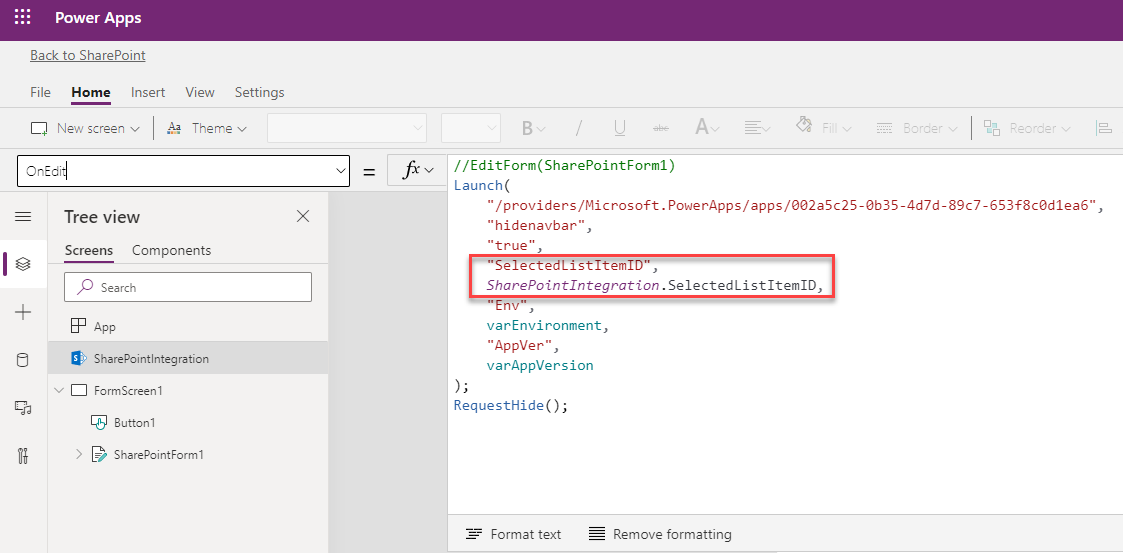
RequestHide();Step # 3 In your customize app go to SharePointIntegration Control. Modify the “OnEdit” event with the code as defined below.
Everything is same as the Step # 2 except the SelectedListitemID property is different.
//EditForm(SharePointForm1)
Launch(
    "/providers/Microsoft.PowerApps/apps/002a5c25-0b35-4d7d-89c7-653f8c0d1ea6",
    "hidenavbar",
    "true",
    "SelectedListItemID",
    SharePointIntegration.SelectedListItemID,

    "EditMode",
    "yes",
    "Env",
    varEnvironment,
    "AppVer",
    varAppVersion
);
RequestHide();

**** NOTE for OnView event ****
Repeat the above code for the OnView with "EditMode" as 'no' or just don't pass it, the default can be coded as 'no'
Step # 4 Modify the OnStart Event of your Full-Screen App.

// Read all query string parameters
Set (
    varSelectedListItemID,
    Value(Param("SelectedListItemID"))
);


Set(
    varEditMode,
    Coalesce(
        Param("EditMode"),
        "No"
    )
);
// These variables are optional, you can use to display the version and env.
Set(
    varAppVersion,
    Coalesce(
        Param("AppVer"),
        "17.0"
    )
);
Set(
    varEnvironment,
    Coalesce(
        Param("Env"),
        "Development"
    )
);
Step # 5 Act on the value of the SelectedListItemID property in the full-screen canvas app. The following code is still in the OnStart event. This will make SharePoint List record new or edit based on the varSelectedListItemId.
/// You need to change your DataSource to your SharePoint List
// If the ID is greater than zero and editmode is yes then just
//      get the record for that ID
// If ID is -1 means user clicked on New
If (
    varSelectedListItemID > 0 && Lower(vaEditMode) = "yes",
    Set(
        varCurrentlySelectedRecord,
        LookUp(
            [[[ YOUR DB SOURCE ]]],
            ID = varSelectedListItemID
        )
    );
    If (
        Lower(vaEditMode) = "yes",
        EditForm([[[ YOUR Edit form ]]]);
        Navigate(
            [[[ YOUR ADD/EDIT SCREEN],
            ScreenTransition.Cover
        );
        , // NOTE: This is the else part, assume this means View.
        ViewForm([[[ YOUR Edit form ]]]);
        Navigate(
            [[[ YOUR View SCREEN],
            ScreenTransition.Cover
        );
    );
);
// if the ID is -1 that means the user wants to create the record.
//
If(
    varSelectedListItemID = -1,
    Set(
        varCurrentlySelectedRecord,
        Defaults([[[ YOUR DB SOURCE ]]])
    );
    Set(
        varEntryType,
        "New"
    );
    ResetForm(AESForm);
    Navigate(
        AddEditScreen,
        ScreenTransition.Cover
    );

);
Conclusion
In the above few steps, you can associate the full-screen PowerApps to the customize SharePoint List. The technique is simple the customized form will launch the full-screen PowerApps.
I hope this is helpful to you. Please post any comments you may have.

Step 5 is unclear where we should add the code 😦
Bruno, I added additional information for Step # 5.
Hi Pankaj, I believe step 5 wasn’t updated and it’s still not visible where to put the code in.
What if the canvas app was not created from SharePoint but created as a custom form in PowerApps? The SharePoint Integration Control is not available unless you create the form via the SharePoint list.
What if the canvas app was not created from SharePoint but created as a custom form in PowerApps? The SharePoint Integration Control is not available unless you create the form via the SharePoint list.