
Summary
The PnP.PowerShell supports PowerShell Core. There are few things you must do to make the PowerShell Code to work in Azure Function App. In this article, I will go through the steps by step all pre requisites.
Step by Step Process
Step # 1 Create the certificate files or acquire commercial certificate
# Change your tenant name
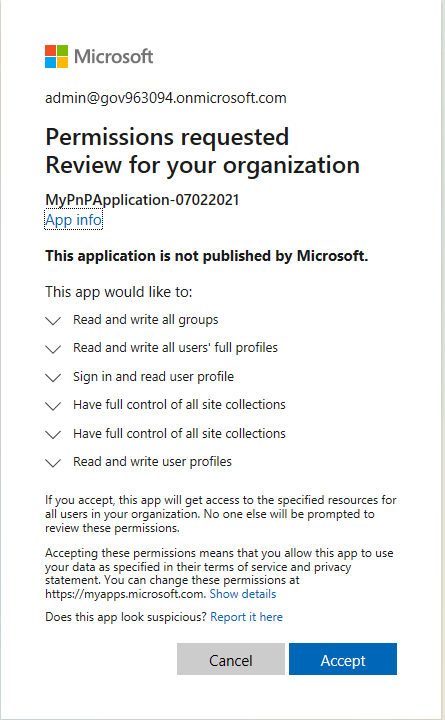
Register-PnPAzureADApp -ApplicationName "MyPnPApplication" -Tenant "GOV963094.onmicrosoft.com" -CertificatePassword (ConvertTo-SecureString -String "password" -AsPlainText -Force) -Username admin@GOV963094.onmicrosoft.com -DeviceLogin
# Note: make a note of PFX file and password you will need in step 3.The above command will provide the DEVICE code to log in to the Azure Portal. You will be asked to consent the requested permissions for “Group.readWrite.All”, “User.ReadWrite.All”, “AllSites.FullControl”, “Site.FullControl.All” & “User.ReadWrite.All.
Once the consent is provided the command will create the Azure AD application and returns the application id. The command also creates the two certificate filed <Name of App>.PFX and <Name of App>.CER.
Step # 2 Create and configure the Azure Function App
Go to Azure Portal and create the Azure Function App. Select PowerShell Core as runtime stack.

Create a Timer Function
- Click on functions
- Click Add
- Select Timer Trigger
- Click Add button.

Configure the profile.ps1
Click on “App Files” -> Select profile.ps1
Add the EnvironmentName for your scenario. If it is commercial you do not need to pass the Environment Variable. Please refer here for more information.
Connect-AzAccount -EnvironmentName AzureUSGovernment -Identity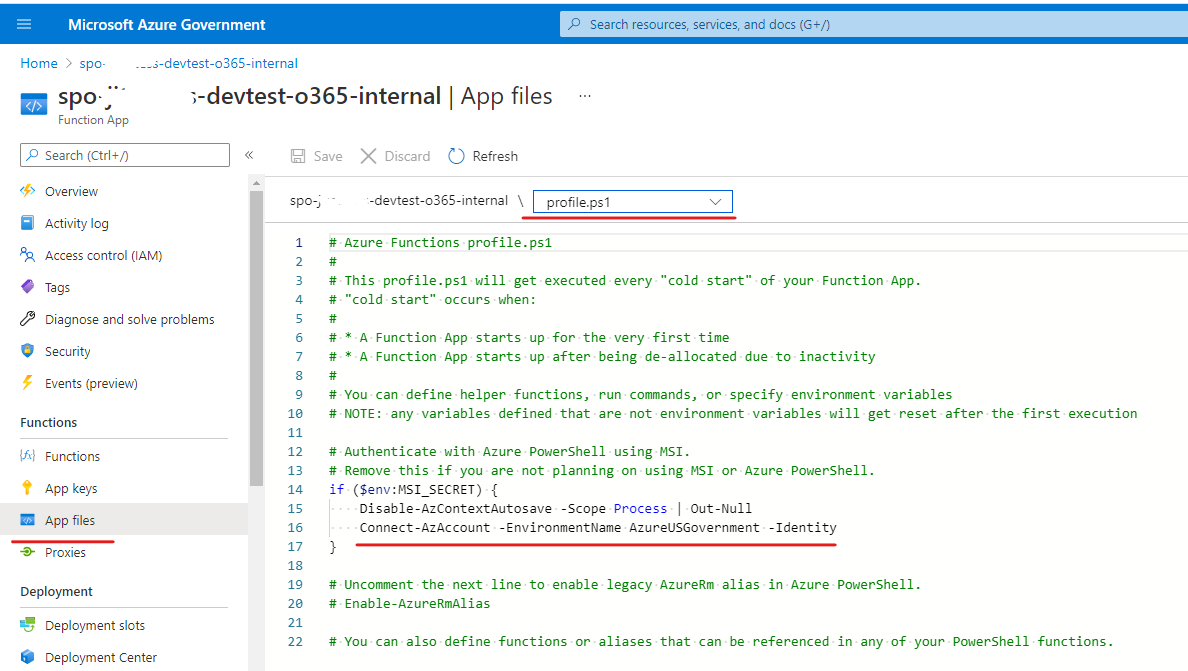
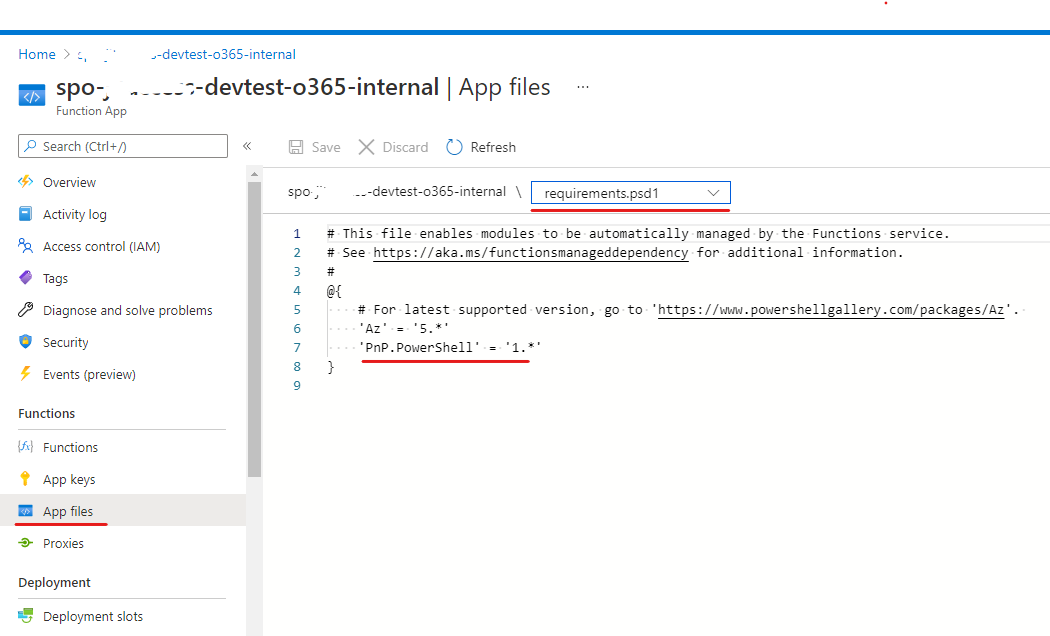
Configure requirements.ps1
Click on “App Files” -> Select requirments.psd1
Add the following line for PnP.PowerShell.
# This file enables modules to be automatically managed by the Functions service.
# See https://aka.ms/functionsmanageddependency for additional information.
#
@{
    # For latest supported version, go to 'https://www.powershellgallery.com/packages/Az'.
    # To use the Az module in your function app, please uncomment the line below.
    'Az' = '6.*'
    'PnP.PowerShell' = '1.*'
}
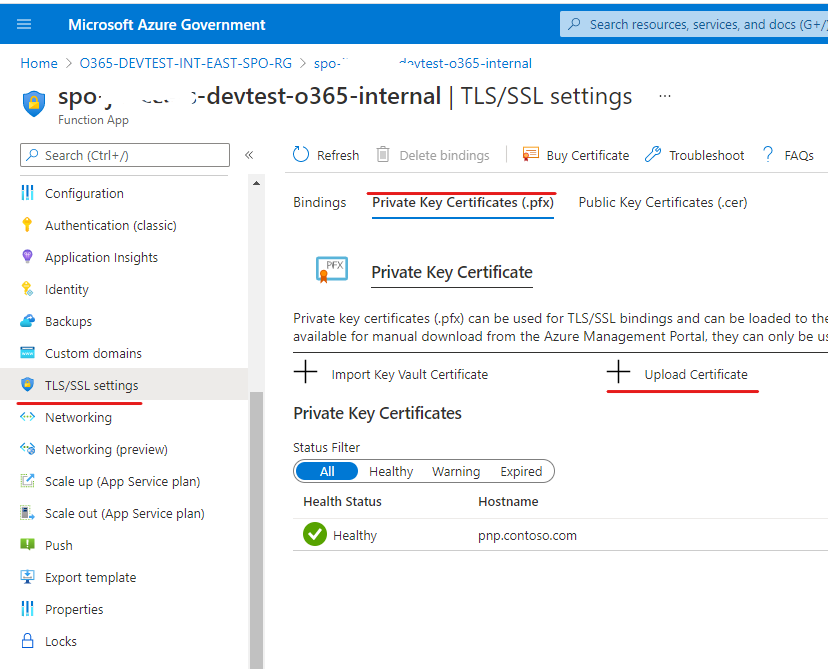
Step # 3 Upload the certificate on Azure Function App
Click on “TLS/SSL Settings” -> “Private Key Certificates (.pfx)
Click on “Upload Certificate”
Select the PFX file created in the Step # 1 and provide the password as you have used in the Step # 1.
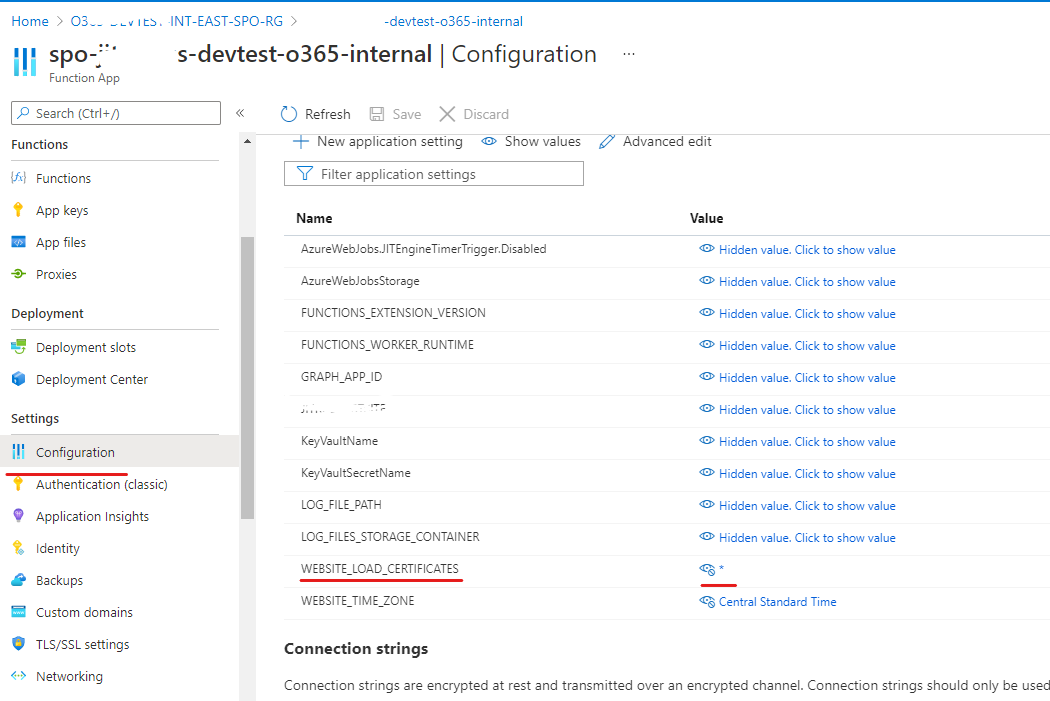
Step # 4 Add the WEBSITE_LOAD_CERTIFICATES configuration parameter
Click on the “Configuration”
Add WEBSITE_LOAD_CERTIFICATES with value of “*”.
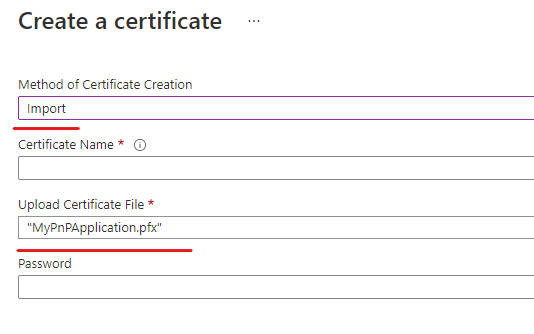
Step # 5 Import the certificate to Azure Key Vault
On Azure Portal for the Azure Key Vault
Click on “Certificates” -> “Generate/Import”

On the next dialog select Import and select the certificate created in the Step # 1.
Finally click on Create. This will add the certificate in the Azure Vault.
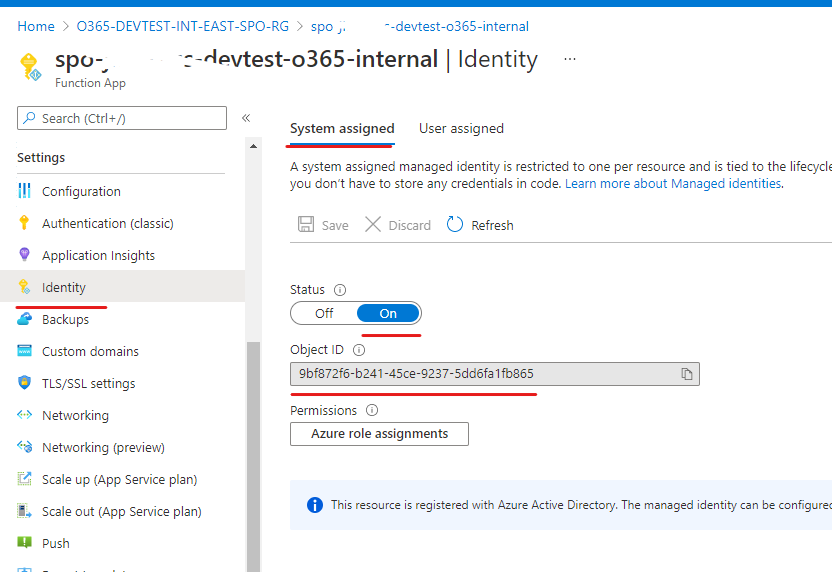
Step # 6 Create Azure Function App’s System assigned Identity
On the Azure portal got the Azure Function App.
Click on the “Identity” under Settings -> “System Assigned”
Turn the Status to On
Make a note of the “Object ID” GUID. Copy to the clipboard you will need it.
Step # 6 Provide Access Policy to Azure Function App in Azure Key Vault
On the Azure Portal, navigate the Azure Key Vault.
Click on “Access Policies” under Settings -> “Vault access policy” radio button for the permission model.
Click on the “Add Access Policy” link.
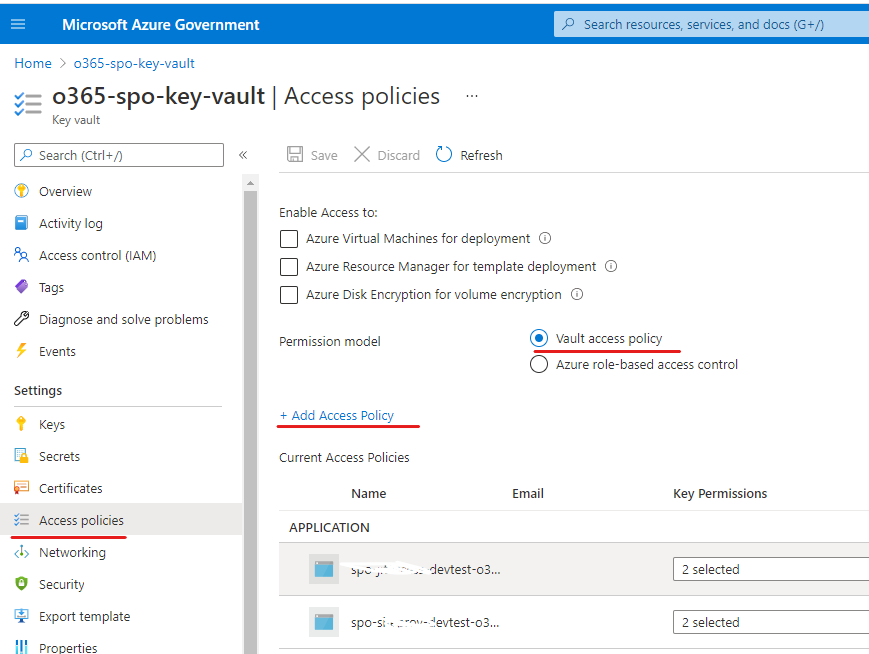
For the “Add Access Policy” dialog
Select “Certificate Management”
Select “Get and List” for the Certificate permissions.
Select “Secret Management”
Select “Get and List” for the Secret permissions.
Finally select the “Select Principal”
In the select permission paste the GUID copied from the earlier step for the system assigned identity.
Click on Select Button and accept all the dialog by clicking Add.
This will add the Access Policy for the the Azure Key Vault. This gives an access to the Certificate in Azure Vault for the Azure Function App using managed identity.

Step # 7 Final step to access the and connect to SPO admin size using certificate.
Please make a note, the import thing in the code is to get the certificate base encode. Once we get it from the Azure Key Vault it is now next step to use the connect command to connect to the any site or admin site.
# Input bindings are passed in via param block.
param($Timer)

$tenant             = "GOV963094";
$RequestWebUrl      = $("https://{0}-admin.sharepoint.com/" -f $tenant)
$GRAPH_APP_ID       = "7c244c08-9875-4ffe-b39d-34f9b6853f6b"
$KeyVaultName       = "my-spo-key-vault"
$KeyVaultSecretName = "storedcertificate"

# get the PFX secret from the key vault
$kvSecret = Get-AzKeyVaultSecret -VaultName $KeyVaultName -Name $KeyVaultSecretName
$certificateBase64Encode = '';
$ssPtr = [System.Runtime.InteropServices.Marshal]::SecureStringToBSTR($kvSecret.SecretValue)
try {
	$certificateBase64Encode = [System.Runtime.InteropServices.Marshal]::PtrToStringBSTR($ssPtr)
} finally {
	[System.Runtime.InteropServices.Marshal]::ZeroFreeBSTR($ssPtr)
}
# Using Splat to convert
$HashArguments = @{
	Url                      = $RequestWebUrl
	ClientId                 = $GRAPH_APP_ID
	CertificateBase64Encoded = $certificateBase64Encode
	Tenant                   = $("{0}.onmicrosoft.com" -f  $tenant)
}
$RequestSitesConnection = Connect-PnPOnline @HashArguments  -ReturnConnection

###
### DO SOME WORK
###
Disconnect-PnPOnline -Connection $RequestSitesConnection
Conclusion
There are many steps but it is listed here step by step for the reference. For any reason you miss the step please refer it back.

Pingback: How to add custom banner to alert “SharePoint 2010 workflow retirement” to site users and owners? | Pankaj Surti's Blog
Pingback: How to automate and govern the “Sites.Selected” permissions using a custom tool? | Pankaj Surti's Blog
Pingback: How to get a list of Site Collection Admins for a SharePoint site? | Pankaj Surti's Blog